A virtualization server is a physical computer that has the necessary resources to run virtual machines. With Hyper-V Manager, you can create, configure, and manage virtual machines on a virtualization server.
With virtual machines, you can perform various tasks. Each virtual machine runs in an isolated runtime environment, allowing you to run different operating systems and applications on your computer.
This article will tell you how to enable Hyper-V virtualization in Windows 10. First of all, let's look at how to check the Hyper-V system requirements, and only then enable Hyper-V and configure a virtual machine.
So, if we talk about the system requirements for the operating system on which the hypervisor called Hyper-V will be deployed, then the Windows 10 Enterprise, Professional and Education editions will do. There must be a 64-bit version of the Windows 10 operating system, since 32-bit versions do not have the ability to use Hyper-V.
In addition, you will need a 64-bit processor that supports virtualization technologies such as VM Monitor Mode Extension and Second Level Address Translation support. It is recommended to use at least 4 GB of RAM, but if you run it on a smaller amount, then the virtual machine will not get anything.
And it will also be necessary to enable these same virtualization technologies, as well as enable Hardware Enforced Data Execution Prevention (DEP). Without this technology, you will not run virtual machines. There are a number of features associated with a specific BIOS or UEFI model. Some technologies may compete with virtualization and therefore prevent virtual machines from running.
The Windows 10 operating system has a tool to check the compatibility of hardware with a Hyper-V installation, which is useful for beginners. Using the systeminfo.exe utility, we will see the parameters according to the requirements for Hyper-V.
At the bottom of the window we find the Hyper-V requirements item and check whether the installation of a virtual machine is supported on your computer. If you find the following value parameters, then you will have no problems installing Hyper-V on this machine:
- VM Monitor Mode Extensions: Yes
- Virtualization Enabled in Firmware: Yes
- Second Level Address Translation: Yes
- Data Execution Prevention Available: Yes
How to enable Hyper-V in Windows 10
Control Panel
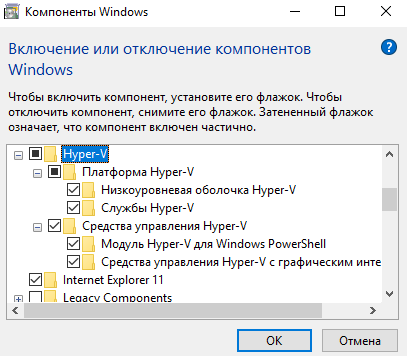
The installation of components will take place quickly enough and the system will request a system reboot. During the reboot process, the user will also see work with updates.
Windows PowerShell
Installing and configuring Hyper-V
The wizard will help you create a virtual machine. Virtual machines can be used instead of physical computers for various purposes. You can configure the virtual machine using a wizard or using Hyper-V Manager.
Before creating a virtual machine in Hyper-V, you must download an operating system image. Can be easily.
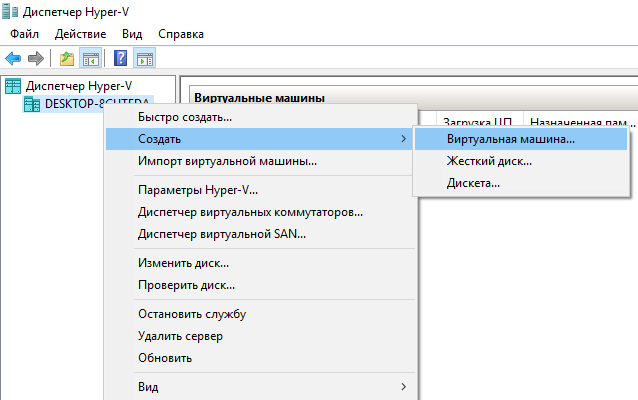
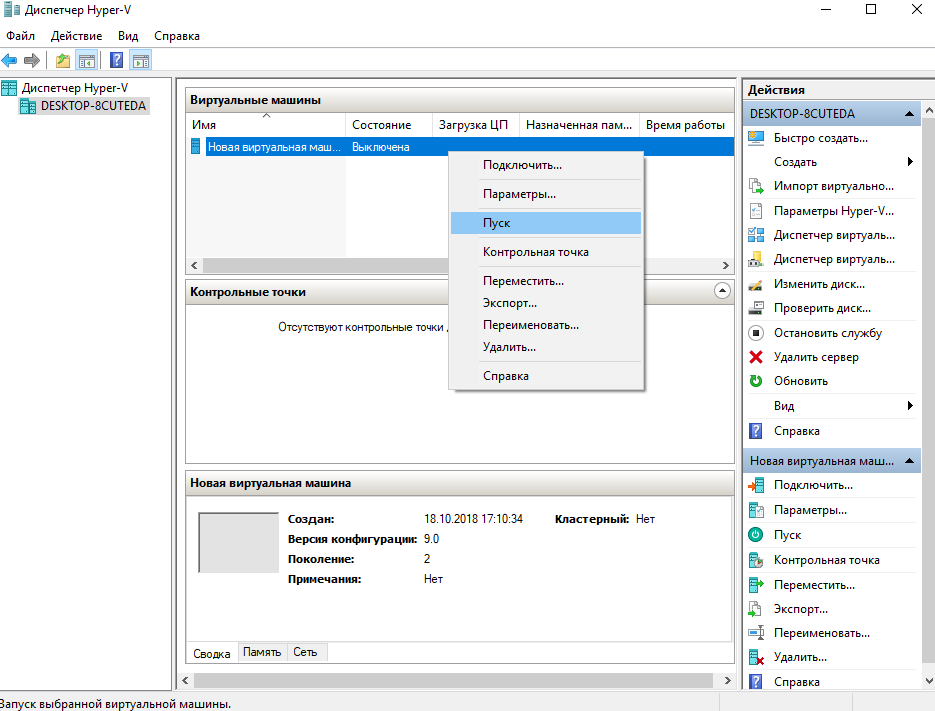
- We open the Hyper-V Manager, which appeared in the system after enabling the Hyper-V hypervisor component.
- Right-click on your device in the Hyper-V Manager and select the item in the context menu New > Virtual Machine…
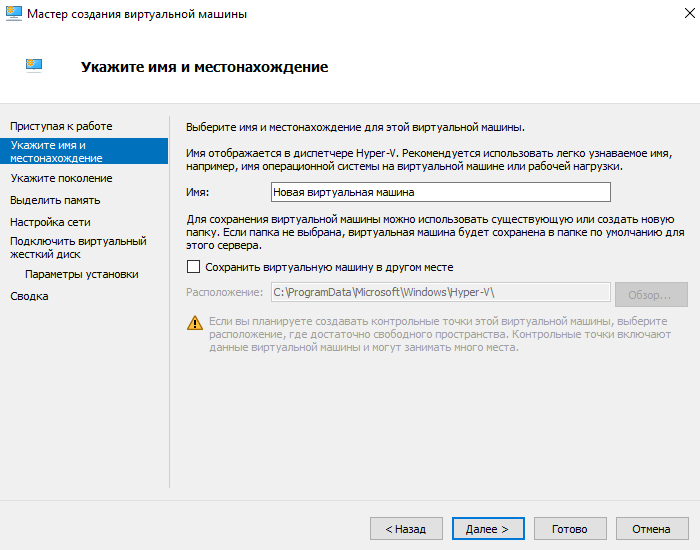
- In the window that opens the virtual machine creation wizard, click the button Further to create a virtual machine with specific configuration options.

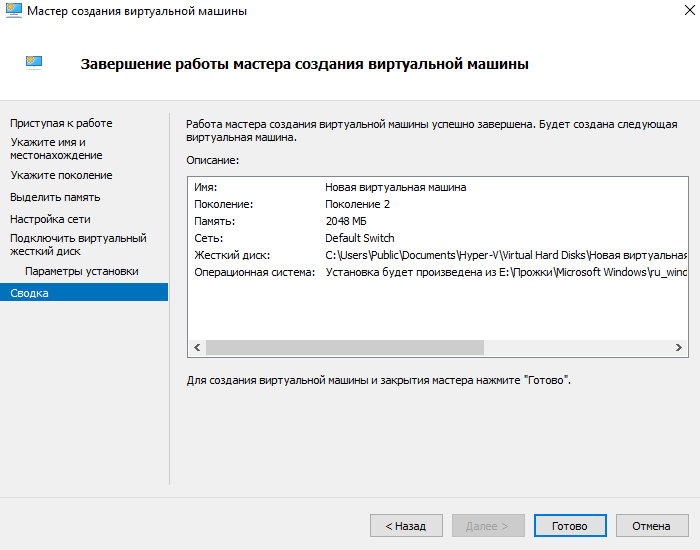
- Specify a name and location for this virtual machine and click Further(the values of the current window can be left by default if you have enough memory on the system disk).
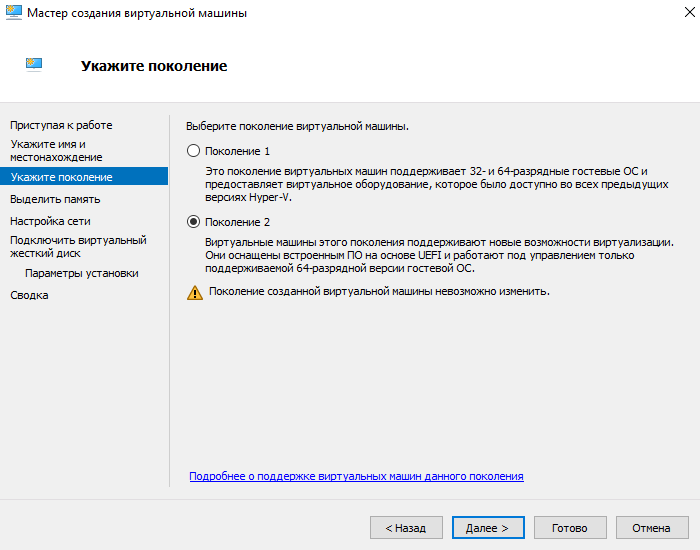
- Depending on the bitness of the operating system that we will install on the virtual machine, select the generation (the generation of the virtual machine you have chosen cannot be changed after creation).
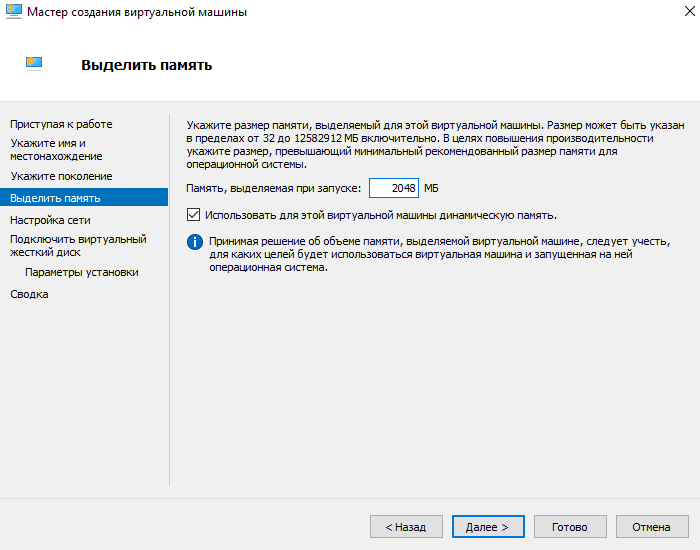
- Next, specify how much RAM you need to allocate for this virtual machine (when deciding on the amount of memory allocated to a virtual machine, you should consider for what purposes it will be used).
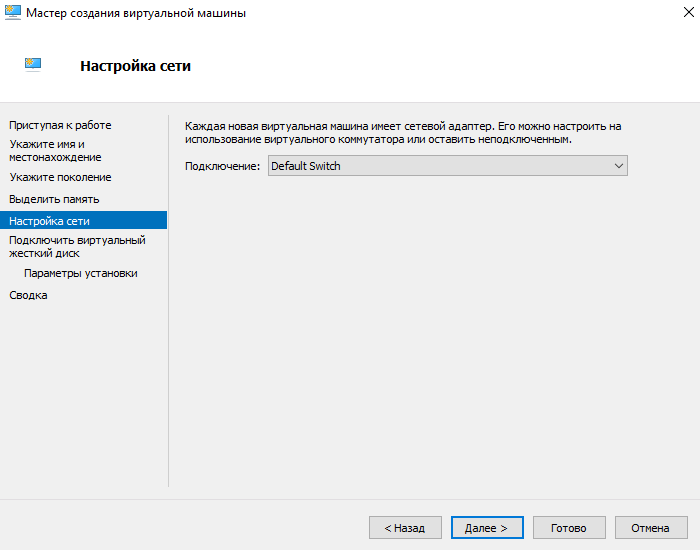
- Select a virtual switch from the available connections, or leave the virtual machine's network adapter unconnected.
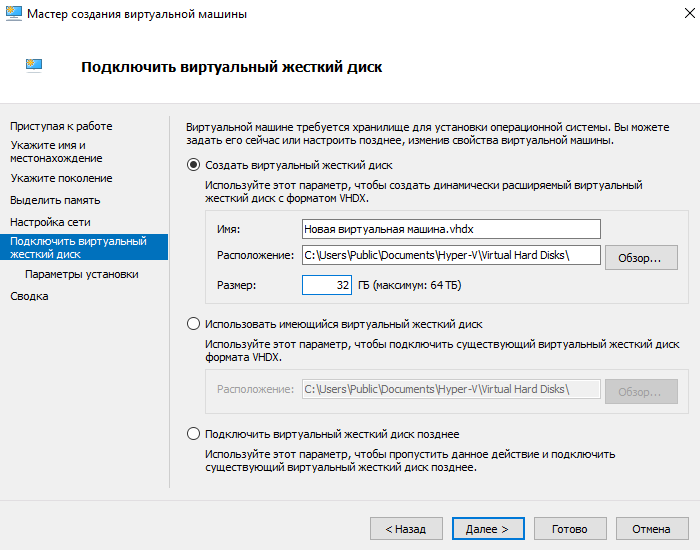
- Now let's create a virtual hard disk by specifying its name, location and size (we recommend that you free up memory on your hard disk in advance).
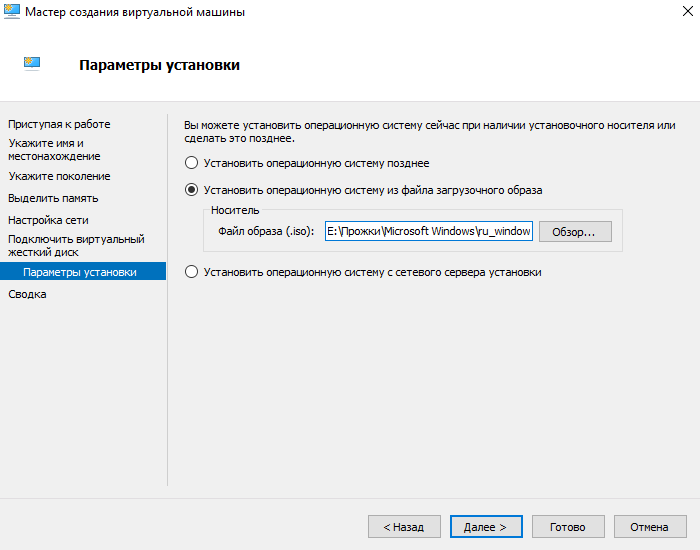
- Next, in the installation options, select the item Install operating system from boot image file and specify the desired operating system image.
- The last step in creating a virtual machine will be to check all the above parameters in the tab Summary and pressing a button Ready.
- Now in the Hyper-V manager, it is enough to start the created virtual machine by selecting the item Start in the context menu and connect to it by selecting To plug.
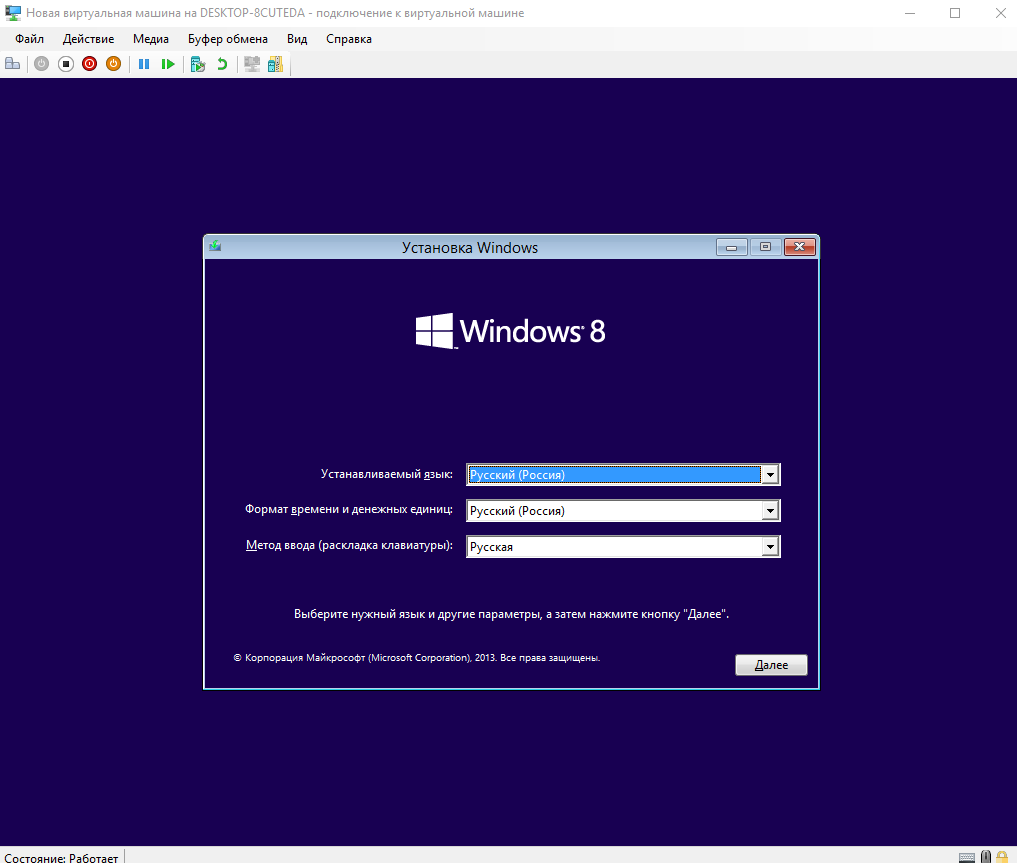
After connecting to a new virtual machine, a new window will open with the image that was selected earlier. Then it is enough to manage and follow the steps to install the operating system.
Conclusion
You can enable Hyper-V virtualization on Windows 10 using the virtual machine creation wizard in Hyper-V Manager. But before turning it on, make sure that your computer meets the Hyper-V system requirements. Only then is it recommended to turn on, install and configure the virtual machine in Hyper-V.