It often happens that the old smartphone case has already lived its life and it is impossible to use it. Or when buying a phone, they completely forgot about its protection. And in order not to spend extra money, but to do a good thing for yourself, you can easily sew a case for your favorite smartphone from any leather with your own hands. It won't be a big deal.
We make a leather model of a case for a smartphone with our own hands
- You need to take a piece of suitable skin (not very thin, preferably about 3 mm).
- Cut out a rectangle from it, in accordance with the dimensions of the phone so that there is not too much free space, otherwise the smartphone will fall out.
- Next, mark with a pencil or chalk a place for a seam - this is about 4-5 mm from the edge.
- Then make holes for the threads with a self-made copier, you can, of course, use an awl for this, but it will take much more time.
- Now you need to carefully drill these holes with a screwdriver and sew along the intended line.
- From a piece of plywood, cut out a rectangle that will roughly look like the phone itself, and put it into the cover blank.
- Immerse all this in cold water for two to three hours in order to add volume.
- After a certain time, take out the product and let it dry for a day or a little more.
- And it remains only to remove the plywood and make the corners of a rounded shape. And also, if desired, try to make holes for the headphones and charger. The cover is ready, you can use it with pleasure!
We create an interesting option for storing a phone in the form of a book
There is also a book version of such a product that most young people like. Its price is quite high, but you can try to reduce costs and show your imagination. It is not so easy to make a leather case-book for a smartphone with your own hands, but the result will please anyone. Unlike a regular case, it looks more elegant and beautiful.
For the product you will need:
- Leather cloth, 2-3 mm thick;
- Thin leather cord or ordinary dense threads;
- Cardboard;
- Screwdriver;
- Awl;
- Ruler (iron is more suitable);
- Water;
- Pen or pencil;
- Magnet;
- Plastic durable form, according to the size of the phone, or ordinary rubber bands.
Let's get started:
- Cut out the base of the smartphone from cardboard.
- Circle the base on the leather canvas twice.
- With an awl, make holes for the thread around the perimeter, with rounded corners.
- Using a screwdriver, make the holes a little larger and smoother.
- Sew two parts on one side, and simply sheathe the remaining three sides with threads (without fastening them together!).
- In a plastic form, make holes for the connectors and sew it to one part of the skin (or you can not use so much effort and just attach the rubber bands so that the phone is kept protected).
- Cut out a small rectangle or oval from the remaining leather fabric and sew it to the bottom of the case.
- Glue the magnets so that the cut out rectangle is fixed on the top.
Here is another finished piece.

We analyze the original idea of an envelope as a gift for a girl
An original and unusual idea. Such a case is more suitable for a gift for a girl on her birthday or on March 8th. Any lady will look at such a surprise with enthusiastic eyes. The most important thing is to connect your imagination, and the rest is nothing.
For the product you will need everything, as usual:
- Leather cloth (pale pink or white);
- Awl;
- Button;
- Threads.
Let's get to work:
- Cut a leather blank (you already know how: in size mobile phone, but do not forget about the shape of the envelope).
- Poke holes in the sides with an awl.
- Sew on both sides.
- Glue one part of the button on the upper triangle, and the second part on the case itself, on top (calculate everything correctly so that the envelope closes normally).
- The gift can be decorated by sheathing with threads or rhinestones.
All is ready. You can surprise.


Workshop on creating another fabric cover
Of course, in addition to elegant and chic cases, you can do something simpler. For example, to make exactly the same product, but using fabric.
For the product you will need:
- Fabric: felt, felt or wool;
- Needles - pins:
- Sewing scissors, but the most common ones will do.

Let's get to work:
- Cut out two bases of fabric with scissors.
- Pinning in some places, sew, by hand or on a typewriter, on the sides and bottom.
- The top is usually left open, but for greater security, you can make a fastening so that the phone does not fall out.

And even if you treat your smartphone very carefully, it will still need a case. Not for protection, but for beauty. Let your handmade product sit on your mobile phone like beautiful clothes and surprise all your friends, acquaintances and ordinary passers-by.
Video selection on the topic of the article
Probably, today there is no person who would not have his own mobile phone. They are used by everyone and everywhere: both the older generation and the younger. In the market of mobile accessories, you can find an endless variety of different cases for mobile phones. If you are used to being original and different from everyone else, then you will like this article.
Here you can find out how to make a phone case with your own hands and what you need to have on hand for this. Original and simple ideas are waiting for you in the article today.
How to make a phone case out of paper?
Do you want to protect your mobile from scratches, moreover, cheaply and quickly? There is such an option - this is the manufacture of a cover from plain paper. If you don’t have a case yet, but you need to run, drive, go somewhere, and you want your mobile to remain safe and sound throughout your trip, and you have little time, the case in question is exactly what you need. necessary.
So, the only thing that is useful to us to create the “protection” in question is a sheet of paper - in this case we will not use scissors or glue:
- Lay a sheet of paper on the table in a horizontal position. You choose the color and size of it yourself.
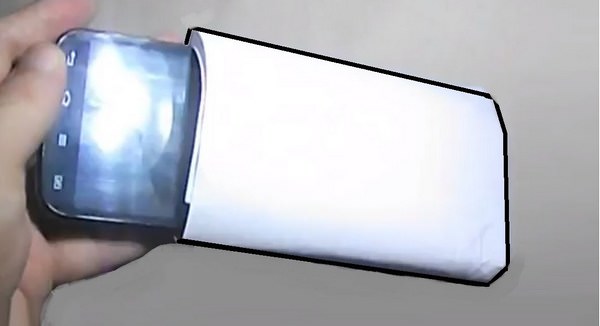
- Place your mobile phone on the left edge of the sheet so that there is room for a twist.
- We begin to wrap the phone in paper, straightening out all the folds. We do this to the end of the sheet.
- We bring the two ends of the sheet together, smooth them. This will back our paper case.
- Fold the bottom of the sheet up. We make several folds to the bottom of the phone case so that the case fits the size of the mobile phone.
- We take the phone out of the case in order to make it more convenient to wrap the corners. This maneuver is done so that the case holds the shape we created.
The paper cover is ready for use. It will take you no more than three minutes to “create” it, so this method of making “protection” for a mobile device is not only simple, but also operational. Now your phone is protected from scratches and rain, and you can take it anywhere with peace of mind.
If you want, you can paint it or cut out a “window” for the screen and speaker so that you don’t even have to get it, but in this case the screen must be covered with a protective film.

Now you are aware how to make your own phone case from a regular sheet of paper. Note neither glue nor tape in this case you will not need.
How to make a phone case out of rubber bands?
Rainbow rubber bands have been a hit for more than one season. With them it is very easy to make various hairstyles, create interesting crafts. Today we will find out how to weave a bright summer case for your mobile device from rubber bands of different colors.
For this we need:
- 800 rubber bands (choose your own color palette)
- hook and loom for weaving
A short list of the necessary tools does not speak of the simplicity of the product, because to make such a case you will need patience, perseverance and inspiration to craft. To say that making such a case is easy is impossible, because the process is quite lengthy.
Detailed manufacturing instructions:
- First of all, you need to decide on the number of colors from which your case will be made (the best option is 10 colors).
- For weaving a cover on modern smartphone, you only need two rows of the machine. In this situation, the central row will not be needed, because we will use only two side rows. For convenience, the row in the center can be removed (if your machine has more rows, they can also be removed for convenience).

- The placement of the columns themselves in the machine is very important. On one side, the open parts of the columns should face in one direction, and on the other side of the machine, in the opposite direction.
- We choose what color we will start our weaving with (for example, it will be black).
- We take an elastic band and carefully throw it on the first column in a row of eight, clinging its other end to the second column diagonally, it turns out that from the first column on the right, we throw it on the second column on the left.
- Thus, we put on diagonally 10 rubber bands of the same color.
- We turn the machine over and begin to throw rubber bands diagonally in the same way so that we get x-shaped figures.
- We put on one elastic band on the extreme columns of the machine exactly vertically, moreover, on one side and the other.
- We lower the worn elastic bands with our fingers to the very bottom, so that it is more convenient to throw on the next rows of elastic bands.
- The next pair of elastic bands (of a different color) must be thrown from one column to another in the same row, from right to left. So continue to the end of the row, using two elastic bands of each color.
- Do the same "maneuver" with the other side of the machine.

- Each row of elastic bands must be secured on the sides with black elastic bands, as in the first row.
- Now we need a hook in order to start weaving. On all columns, you must throw off the two lower elastic bands. It turns out - we throw one row, then we throw off the two lower elastic bands - this will be our weaving.
- We grab the two lower elastic bands with a hook and transfer them to the center. So we do with each column on two sides of the machine.
- We lower all the elastic bands down for convenient throwing and weaving the next row of elastic bands.
- In order for the color transitions on the cover to be smoother, it is necessary to throw on the next row of rubber bands, shifting the color by one column. In order for the first column not to be empty, it is necessary to throw an elastic band of a different color on it.

- Now we repeat everything, starting from the eleventh point, each time shifting the color by one column for smooth transition. We fix each row with a black elastic band.
The considered process of weaving the cover is quite long, and at one time it is very difficult to complete the work to the end.
When Bottom part case will be large enough, you need to check how many more rows you need to make so that your phone fits in it. To do this, you just need to put your phone in the made part of the case.
- You also need to finish weaving the cover correctly. So, we take the hook, grab two rubber bands on the first column in the row on the left, carefully remove them and transfer them to the next column.
- We do this with each column in the row. Repeat in the same way with the columns in the other row.

- The cover is ready, we remove it from our machine, and try it on our mobile device.
This work is quite painstaking, but the result is worth it. The brightness and originality of the made cover will delight you.
How to make a balloon phone case?
If you turn on your imagination, you can come up with and “make” unusual and beautiful things with your own hands, so, for example, you can make an excellent case for your smartphone from an ordinary balloon. Let's find out how to make a phone case at home, using a regular ball:
- We inflate the ball. No need to inflate too big, the average size of the balloon is what you need
- We put it on a flat surface, holding the place of inflation with your fingers so that the air does not escape
- We put a mobile phone on top of the ball
- We press it to the ball, gradually lowering the air from the ball with the other hand. Do it gently and very slowly.
- As the ball descends, we press the phone harder to its surface
When the ball is completely released from itself, it will tightly “wrap” your phone with its surface, thereby protecting it from moisture, dust and shock.
- If the tip of the balloon gets in your way, just cut it off.
This case is budget option, he:
- cheap
- practical
- its easy to make
- and you can change the colors of the cover at least every day

In addition, this is a universal protection option, because it is suitable for most models of modern mobile devices and tablets.
How to make a phone case out of glue?
Did you know that with hot glue you can not only glue and stick, you can use it to make an unusual, practical and original phone case. The size, shape and model of the device in this case do not play any role. So, to make our case perfect, we need:
- hot glue gun
- parchment paper
- scotch
- for decor - colored varnishes
Everything is done very quickly and simply, let's get started:
- Turn on the gun to heat the glue in it.
- While it is warming up, it is necessary to wrap our phone in parchment paper. It is necessary to do this so that no wrinkles and excess paper remain on it, parchment paper should wrap the phone tightly and in one layer (adhesive tape will help with this).
- We spread parchment paper on a flat surface, put the phone on it.
- We draw various patterns with hot glue on the surface of the parchment paper in which the mobile is wrapped (design and patterns are chosen independently, based on preferences and drawing skills).
- Do not forget to leave space for speakers, side holes for charging and headphones.
- We are waiting for the glue to completely harden in order to carefully remove the frozen case from the phone.
- We decorate it with various colored varnishes.

The main advantage of such a cover is its originality and uniqueness. No one will have such a case except you. You are now aware how to make a phone case with hot glue.
How to make a silicone phone case?
Probably, few people have come across the independent production of something from silicone. It turns out that not everything is as difficult as it might seem. So let's find out how to make a phone case from silicone. We will need:
- disposable plate
- starch (potato or corn)
- silicone
- paints
Instructions for making a silicone case:
- Pour some starch onto a plastic plate. It can be purchased at any grocery store or supermarket.
- Pour some silicone on top of the starch, and gently combine these two ingredients.
- We add paints to the prepared “dough” (choose colors according to your taste) to get the color we need.
- We knead the silicone like plasticine until it is soft and elastic, and so that its color becomes uniform.
- Now you need to start preparing the phone. To do this, wrap it over the entire surface with cling film.
- We sprinkle the table with starch so that the silicone does not stick to the surface, and proceed to rolling out the silicone “ball” we made with a rolling pin.
- We put the phone on top, form a case.
- We remove all irregularities and excess starch with a rag, but only be sure to dry it.
- Trim off any excess silicone.
- From the remnants of the silicone mixture, you can mold additional molds, patterns, decor on the case.
- Glue them to the case with silicone.
- Cut out holes for the sensor, microphone and headset.

If you wish, you can decorate the cover in any color.
How to make a flip case for your phone?
Today, book cases have become a popular way to protect phones and tablets. Let's find out how to make a phone case out of cardboard and felt without outside help, to get a model of a cover - a book, without spending more than 15 minutes.
Prepare immediately:
- cardboard (preferably thick)
- felt - several colors
- scissors
- elastic band
- cutter
- optional - self-adhesive decor in the form of rhinestones
- ruler with pencil
- glue gun
Manufacturing instructions:
- It is necessary to cut out three blanks from thick cardboard that will be identical to the size of your phone. To do this, put the phone on cardboard, trace the outline with a pencil, cut it out. Duplicate the workpiece two more times.
- We cut one of the cut blanks in half with scissors or a cutter.
- We take A4 size felt and glue two halves of the cut blank on it at a distance of 7 mm from each other.

- We glue another whole blank to the felt at a distance of 3 cm from the previous blank.
- We cut off the excess felt, leaving allowances in order to glue our cardboard with them.
- On the whole blank and one of the halves of the second blank we glue the felt of a different color.
- The last blank of cardboard must be pasted over with felt of the same color that was used in the previous paragraph.
- At the edges we glue small elastic bands on it, which will hold our mobile phone.
- We glue the blank with elastic bands onto the part of the cardboard that remained unglued on the first part of our future cover.
- Glue Velcro to the finished case, which will serve as a fastener.
- We decorate the cover-book with rhinestones, stickers or beads.

Optional, same the cover can be made of leather or any other fabric.
If you decide to “make” a phone case with your own hands, for these purposes you can use various improvised materials in the form of felt, silicone, fabric, glue, etc. The main thing here is your imagination and desire to make something original and unusual with your own hands. The methods presented above are very simple and do not require special expenses, so choose any of them and go ahead - create your own “works of art”.
Video: "How to make a phone case?"
The desire to beautifully decorate your phone arises in every visitor to the site of the online store https://itsellopt.com.ua/ at the sight of attractive covers and bumpers. But not all of them can give the means of communication proper protection in the event of a blow or fall. And if there is a shock-absorbing bumper for the phone in the assortment, then it will either not be suitable for your model, or its cost will be astronomical. There is only one way out - to spend a little time, imagination, effort and make a beautiful case from improvised materials.
Everyone wants to decorate their phone
Colorful bumper can be made from mold making silicone without touching brushes, glue.
To prepare the material you will need:
- Construction silicone;
- Potato starch as a thickening agent and for whitening;
- Color or acrylic paint.
In the process of kneading, it is better to use silicone gloves. So the hands will feel the material, and you won’t have to wash them for a long time.
Manufacturing technology:
- After squeezing out the silicone, you need to add two tablespoons of potato starch to it.
- The process of kneading the silicone "dough" is similar to the preparatory stage before sculpting from plasticine. It must be kneaded until the mass becomes homogeneous.
- If you divide the resulting mass into several almost equal pieces, and add color to each of them, you will get multi-colored balls. They need to be flattened, folded so that each previous one peeks out a few millimeters from under the previous cake.
- Using a rolling pin, the workpiece must be rolled out so that it is enough for the back wall of the gadget, its edges and a small bend on the front side.
- The phone is wrapped in the resulting multi-colored or plain silicone sheet.
- It needs to be pressed a little into the "dough" in order to outline the holes for the camera, the speaker grill, located on the back side.
- Connectors, control buttons from the side elements of the phone must be outlined by swiping your thumb around the entire perimeter of the phone.
- The silicone needs to dry. Its readiness time depends on the thickness of the rolled layer and the data provided by the manufacturer.
- It is better to remove excess silicone immediately with a stack or a plastic knife. Without excess material, it is easier to form corners.
Advice! The hardening of the silicone mass can take up to 12 hours. Move the SIM card to another phone or make call forwarding. Otherwise, a smooth surface of the cover will not work.
Gallery: bumper and phone case (25 photos)


How to make a silicone bumper with your own hands (video)
How to make a transparent phone case
The easiest way to put your phone in a transparent case that only protects from getting wet and dusty is to use a piece of shrink wrap. Find raw material available at any grocery store. It comes in glass jars with canned food.

You can find the source material at any grocery store.
Cut out a rectangle from the film so that it is more phone 1.5-2 cm on each side. When bending the film on the front side of the phone, it must be heated with a lighter flame. Only the flame should not touch it. A uniformly planted film will become the skin of the gadget. It can only be removed with scissors. But that will be much later. In the meantime, a manicure set is required in order to cut holes for the camera, side buttons, charger and headphones.
Transparent silicone case
To make a transparent silicone case, you need the appropriate quality material. Silicone sealant for glass bonding is best suited for this purpose. Its setting time is 30 minutes.
For work you will need:
- Box. The one in which the phone was sold will do.
- Soft plasticine or dough for modeling.
- Polyethylene film to protect the phone from contact with materials - plasticine and uncured sealant.
Step-by-step instruction:
- The box is filled by a third with plasticine or dough.
- The phone is placed in a thin plastic bag.
- It must be placed in the middle of the plasticine cushion and pressed evenly to get a shape 2-3 mm deeper than the thickness of the phone itself.
- The resulting form must be smeared with an even layer of sealant.
- Re-insert the phone into the recess made by it.
- Silicone extruded onto the surface can be slightly leveled, giving it the shape of a future cover.
- After the material dries, the phone together with the bumper is taken out of the mold. Cleaned from plasticine and polyethylene.
Advice! If the protective layer of the cover is planned to be thicker than 3 mm, then the recess in the plasticine mold must be made deeper.
How to decorate a silicone case
Decoration of the silicone case can be done in the process of its manufacture.
- You can insert small rhinestones in the form of your own initials, contours of animal faces and other simple ornaments into a thick transparent silicone layer.
- Sequins are added to silicone in the process of smearing the mold with it or preparing the “dough” before rolling. In the first case, shiny crumbs can be poured through a strainer, which is necessary for even distribution. In the second, it is better to mix them with potato starch.
- Glue-based rhinestones will allow you to make an original decoration on the back wall of the bumper.
- The most original and unique silicone covers are obtained by decorating with bitmaps made with acrylic paints. Material in small tubes with dispenser spouts can be purchased at needlework stores. You can draw and decorate any pattern for the cover yourself.
The easiest way to decorate is to find beautiful picture, desired format and insert it between the phone and the case. It makes for a great decor.
How to make a balloon phone case
The technique of creating such a bumper is like vacuum packing a phone in latex.
- The balloon inflates to medium size.
- It must be laid on a flat surface, holding the neck with two fingers.
- Place a phone in the middle.
- The gadget must be slightly pressed down, and the air from the ball must be bled.
- A couple of minutes of work, and the phone is dressed in a new bright shirt.
- It remains only to cut holes for the camera and connectors, and thin material will not interfere with the operation of the buttons anyway.

The technique of creating such a bumper is like vacuum packing a phone in latex.
Paper smartphone case
A book cover made of vinyl wallpaper is made according to the principle of a box.
For this you need to take:
- ruler;
- Pencil;
- Scissors;
- Glue.
The cover can also be made using origami
Cover making:
- On a sheet of paper, stepping back from the edge of 1 cm with an increase in the thickness of the side wall, the contour of the phone is outlined.
- Departing from Figure No. 1, a gap equal to the thickness of the device + 1 mm, the phone is circled a second time.
- Above and below the wall thickness + 1 cm is also added.
- Cut out, using nail scissors or a blade, holes for the charger, headphones, camera lens, screen.
The same bumper, made of corrugated cardboard, will give excellent protection to the phone in case of bumps and falls. The only thing is that it is more difficult to decorate it. It can be painted, applied to it with a dense bitmap with acrylic paints. But this will not protect the paper from getting wet in the rain.
You can independently increase the moisture resistance of paper or cardboard using lamination. In order for a homemade cover to be both beautiful and moisture resistant, it must first be cut, painted, laminated, and only then assembled.
Is it possible to shrink the rubber cover
During operation, the rubber covers stretch. They can be returned to their original size. To do this, they must be immersed in boiling water. They will become more plastic, and when cooled, they should return to their original size.
Some bumpers made of rubber with a high proportion of plastic are not as flexible as rubber. But they can also be made smaller at home. If immersing the cover in boiling water does not lead to the expected result, you can try to boil it for 5 minutes - the principle of preparing a polyethylene suction cover. He works. Just do not need to pull a wet bumper on the phone, the moisture must be removed from it.
Making a Coca-Cola case (video)
(No ratings yet)
Now beautiful cases are very popular, but sometimes there is not enough money to buy an interesting phone case. But to look original and stylish, you can make your own phone case from fabric with your own hands. There are many tutorials on the Internet on this topic. Therefore, anyone can make such an original little thing.
Stylish protection
How to make such a cover? One of the most simple ways to make such protection for the phone is a sock. This type of cover will be unusual and certainly cannot be found similar.
In order to make such a cover, you need to take:
- cute sock with bright colors and patterns;
- needle and thread;
- sample;
- felt of any two colors;
- adhesive tape;
- scissors;
- pins;
- floss for embroidery;
- beads.

In order to sew a cover from a sock, first of all, you need to measure the phone. Write down the width and length of the phone. According to the measurements, it is necessary to draw a template on the paper of the future cover.
After that, you need to cut off the elastic in the sock and attach a fabric template, draw the silhouette of the cover with chalk and cut off the excess, but we must remember that we leave one centimeter for an allowance.

After that, we put the sock part on a hard surface and cut it vertically 4 centimeters. After you need to expand the two halves of the sock and fold where the cuts are, into triangles. It looks like horns. Now these horns or ears need to be sewn on.
Note. The main thing that horizontal line, which passes through the ears, was even.
When the work with the ears is over, you need to proceed to the muzzle. To do this, a circle is cut out of paper, with a radius of 4 centimeters. Then apply this pattern to white material and cut it out. After you need to take the blank of the cover, sew it on all sides, without touching the upper part. You need to sew from the wrong side. Then turn the product inside out and straighten all the seams. After you need to take a white circle and start connecting it with threads to the cover. With small stitches, walk along the edge of the white fabric. It is better to use threads to match the sock. When the muzzle is sewn, then we sew on the bead. Such a bead can serve as a spout, and antennae and eyes must be embroidered from floss.
Next, in order to make the lining for the cover, you need to take felt of any color and cut out a rectangle from this fabric that will fit the size of the cover. We fold this rectangle in half and sew it from the bottom and side. We insert the ready-made form for the lining into the case, cut off unnecessary parts and carefully wrap the edges. Then we sew two parts of the product with small stitches.
Denim accessory

Another option for a phone case can be made from denim. This model will look very unusual.
To sew such a cover, you need to take:
- Denim, it can be old jeans;
- Lining fabric;
- plastic bottle;
- Threads with a needle, scissors;
- Small magnet;
- The plate is metal.

Progress
The phone for which you need to sew a cover, attach it to the fabric and outline the silhouette, do not forget about allowances, the same manipulation must be done with the lining fabric. Then cut along the marked line. Then we sew the lining fabric with the main one. We take a plastic bottle and cut out a strip from it, which should be equal to the width between the lines of the workpiece, and the length is two centimeters shorter.
After you need to sew a fabric strip, which will serve as a strap. Color and fabric can be customized. The length of such a tape should be 4 centimeters longer than the phone. This strap must be sewn to the plastic at a distance of 4 centimeters from the top edge.
After that, the part from the material must be turned out, and a bag will turn out. Then you need to attach the plastic to the workpiece from the side of the lining fabric and mark with a pencil the place of the slot for the strap. It is important to process the cut, this can be done manually with neat stitches. Then insert the plastic into the bag and pull the strap out of the hole. Now you need to cut through, on the other hand, all three layers. To do this, it is better to use a clerical knife and stitch the edges.
It remains only to sew the cover in half. At the end, you can stick some rhinestones, sew on a patch, beads. It is possible to choose any cover or product decor, look at the photo.


in the form of a book
How to make a book cover with your own hands? The phone case in the form of a book is very convenient. After all, you can put both headphones and a card in such a book.
In order to make such a cover, you need to take the main and lining fabric, lace ribbon and thick ribbon, lace, two buttons, thread with a needle, scissors.


The pattern is done like this: the phone is applied to the paper and drawn along the contour, taking into account the indentation of one centimeter. Cut out the pattern and transfer to a double folded fabric, then cut. Do the same manipulation with the lining fabric. Sew two pieces of fabric together. In the upper part on the left we mark 5 centimeters, and from the same angle we drop by 7.5. Sew a tight ribbon in the upper part, and a lace in the form of loops on the side. Then you need to sew pockets. For this, the main fabric is taken, the width of the workpiece, and the height is less than 3 centimeters. Separate the two pockets in the middle with a seam.
Sew a lace ribbon to the base of the pockets. Sew a small button for the cord loop on the front of the cover, and a larger button on the inside for the second loop. Following this master class, everyone can make a beautiful case for their phone. For beginners, sewing such a product will not be difficult.
Video on the topic of the article
This article provides a video tutorial on how to make your own fabric phone case.
A special case will help to extend the operational life of the phone, which prevents the appearance of cracks and micro damage. Currently in stores big choice various models.
Most of us love unusual things that help us stand out from the crowd.

A large number of interchangeable covers and panels helps to diversify the design of a mobile phone.

Buying the necessary accessory is quite simple. Another thing is to do it yourself from a variety of improvised materials.

Here you can emphasize your individuality and exquisite taste. Our material presents several ways to create a cover with your own hands.
Materials for creating a protective case
How to make a case with your own hands? Everything is quite simple. The main requirement of the whole process is the availability of free time and good imagination.

Various materials can be used to make an accessory:
- felt;
- jeans;
- silicone film;
- wide elastic band;

The soft base of the materials protects the mobile phone from daily tests. There are no scratches or cracks on the glass surface.

Tools for making a mobile accessory
These include:
- sharp scissors;
- ruler;
- button;
- glue;
- ribbon or long lace;
- sticky base.

When working with each material, it is necessary to take into account its properties. For example, felt does not fray at the edges when cutting out details, while denim needs additional border design.

Silicone film does not like frequent exposure to a sharp needle. To do this, you need to use glue that dries in a few seconds.
The process of making a phone case
The initial stage of creating a case is the preliminary design of the future accessory. To do this, you can draw a sketch of the product on paper. It is important to consider the size of the phone, as well as the location of the camera and microphone.

The finished case should be slightly larger than the size of the mobile phone. This will allow you to freely pull it out whenever necessary. Fabric accessories do not require specific sewing skills. Here you need to carefully sew the two parts together.

The process of creating a cover is divided into several stages:
- Cut out paper patterns.
- Transfer them to the material from which the cover will be made.
- Carefully cut out each piece leaving 1 cm for the seams. This technique allows you to sew the right product, taking into account the parameters of a particular model.
- To connect felt and denim, you will need a sharp needle and a strong thread.
- To make a silicone phone case, specialized glue will help.
- When all the parts are interconnected, you can fix the protective button, which will prevent the cover from constantly opening.
For people leading an active lifestyle, you will need sports case for phone. Due to the tight elastic band on the forearm, it is well fixed on the human body.

For this, a small piece of dense elastic is sewn to the finished protective product. In the process of movement, it will tightly press the body of the mobile to the hand.

Note!

The design of the phone book cover is a cover. The body of the mobile phone is fixed on one side, and the other part serves as a protective panel. A snug fit of the upper part of the case will provide small magnets that are fixed in upper corners covers.

You can make additional sections for storing plastic cards using a multilayer fabric structure.
To do this, you need three fabric bases, which differ in size.

The first part of the pocket is sewn to the base of the cover. All other elements are sewn together and fixed to the previous parts of the cover.

Decorative elements will help create an exclusive design of your phone accessory. Fabric appliques will add zest to your product. Do not use multi-colored details for the design of the cover.

Note!


DIY phone case photo


Note!

