Send this article to my mail
The main reasons for the need to introduce an exchange between 1C databases are the presence of branches and the separation of types of accounting, tk. companies often work in several infobases. Setting up the 1C 8.3 exchange allows you to eliminate double work - entering the same documents and directories in two programs, as well as quickly supplying the necessary system objects for various branches and departments.
In the case when it is necessary to exchange between branches, RIB (Distributed Infobase) is used. It is a mechanism for exchanging between identical configurations. It is a tree, on top of which is the most important root node, below a pair of interconnected nodes. Changes can be made at any node in this system, and they will be propagated to other related nodes. It also distributes not only data, but also configuration changes from the root node to subordinates.
If it is necessary to separate the types of accounting, for example, maintaining an operational one in the trading base, and regulated - in the accounting one, universal exchange mechanisms with flexible data synchronization settings are available.
One of the latest developments in 1C is the EnterpriseData data exchange format. It is easy to use and is intended for exchange within the company both between 1C databases and third-party programs.
The implementation of data exchange in the enterprise can be represented as sequential procedures.
First of all, it is necessary to determine between which bases there should be an exchange; will it be a two-way or one-way exchange; if one-way, then which base will transmit information, and which will only receive; if this is a complex branch network, then it is necessary to prescribe a scheme for building databases.
Then choose the appropriate format: RIB, universal format; exchange according to the exchange rules; exchange without exchange rules.
The next step is to select the transport to perform the exchange. Available big choice technologies, we highlight the main ones: directory (local or network), FTP resource, COM connections, web service, email.
The fourth step will be the definition of data: documents, directories and, if necessary, detailing to their individual details to be transferred.
And in conclusion, a schedule for the frequency of the exchange is prescribed
Each option for setting up the exchange 1C 8.3 requires careful preparation. Its implementation is beyond the power of every user, here it is necessary to take into account many nuances and understand the principles of the exchange. Particular attention will need to be paid to setting up if the bases: contain improvements or a lot of extras. details, platform versions differ or outdated configuration versions are used, the enterprise is large and uses an automated system consisting of a large number of databases. Mistakes are not allowed here, because may lead to irreparable consequences. Independent implementation of the exchange in 1C is recommended only if you need to set up a simple transfer of information between typical configurations.
If you doubt your abilities, it is better not to save money, but to contact a competent specialist who will help you decide difficult task exchange settings 1C 8.3.
If you still decide to configure 1C exchanges without involving experts, it is recommended that you first test on copies of the databases, and before starting work in the working databases, upload the configurations so that you can return to the original state in case of errors.
Below we give detailed example 1C 8.3 exchange settings unilaterally between standard configurations Trade Management 11 (UT) and Enterprise Accounting 3.0 (BP). The example is relevant for many companies leading wholesale and retail trade. In UT, management accounting is maintained, in BP - regulated, the exchange is necessary to facilitate the work of users.
This algorithm is also suitable for other typical configurations on the 1C 8.3 platform
First of all, we will carry out preparatory work for the information receiver, i.e. for BP. Run the program in Enterprise mode. You need to set the Data synchronization constant (section Administration → Data synchronization).
Pay attention to the Prefix field, here you need to specify a value that will later allow you to distinguish (by the value of the reference code or document number) in which program the objects were originally created. In our example, the usual abbreviation is suitable - BP and UT, if the 1C 8.3 exchange is configured for a complex exchange between a large number of bases, as well as the same configurations, each base will need to enter its own understandable designation.

Since the PSU is only a receiver of information, we proceed to setting up the UT.
Here, as well as in the BP, you need to enable synchronization and specify a prefix. This information is available in the section Master data and administration → Data synchronization settings.

Select the setting method Specify settings manually. Further.
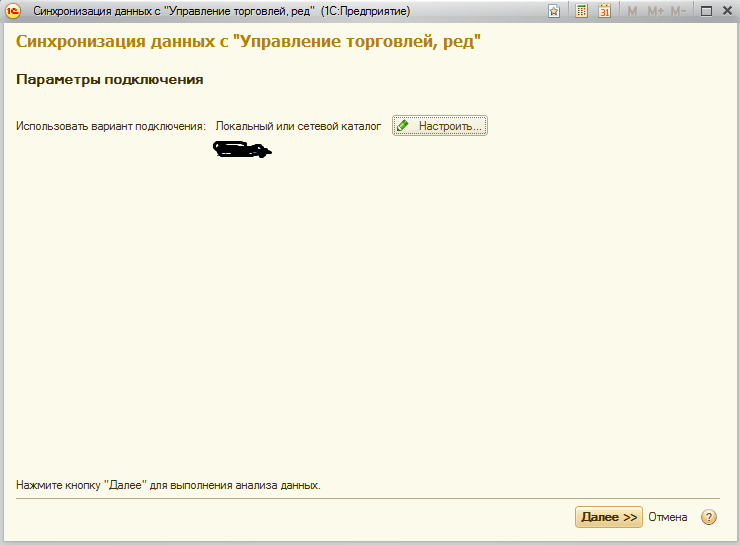
Set the direct connection option when both programs are located in the same local network, specify the parameters for connecting to the IS directory in this network, and also fill in the authentication information about the user (in the BP database). Further.

The system will check the correctness of the specified data and in case positive result will display the exchange settings window 1C 8.3.
The Edit data upload rules link provides settings for performing the exchange. We will make clarifications of NSI - upload only those used in documents, select organizations and the option of working with contracts - without linking, separating documents by warehouses. The exchange starts on March 1 of the current year.
The introduced rules are recorded and closed.

Since in the example we are talking about one-way information transfer, in the next settings window, to receive data from another program, set the values to Do not send. Record and close. Further.

Now you need to check the entered parameters and if they are correct, click Next, otherwise return to the previous step by clicking Back.
You will then be prompted to sync. Click Done.

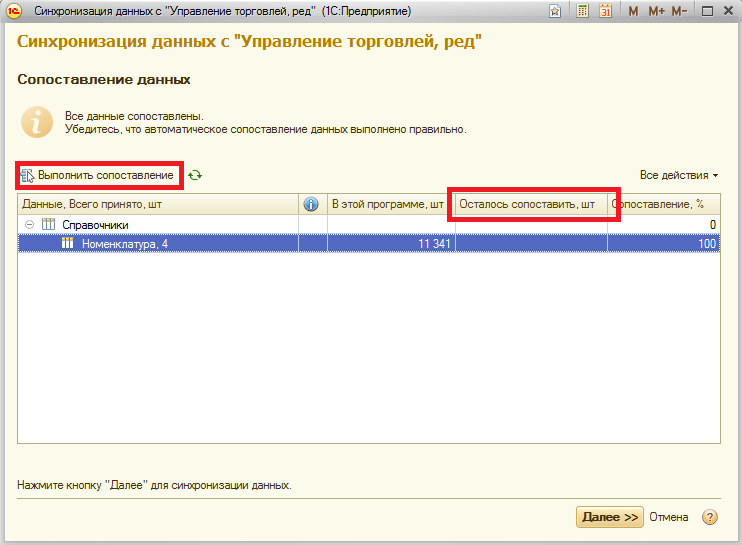
If it is necessary to correlate identical objects of two configurations, a window for data comparison will open. Perform the mapping and click Next.

When transferring objects, problematic situations may occur, you can view the results by clicking the Warnings when synchronizing data link.
After the synchronization is completed, a window will be displayed confirming the successful completion of this process.
Here, using the Configure command or after, in the synchronization script, you can configure the schedule automatic execution exchange.
Each plan has a certain list of elements, information about the change of which it can store. This list is called the “Composition of the exchange plan”. The composition can be expanded, but configuration support is removed.
The "Plan Layout" stores the very rules on the basis of which synchronization works. It is this conversion package (Registration Rules, Exchange Rules, Correspondent Exchange Rules) that we need for further study.
Consider an example of data synchronization between the configurations "1C: Payroll and HR 3" (ZUP) and "1C: Enterprise Accounting 3" (BP). We note right away that in this task we will have to remove the configuration from support. This is required by condition.
A living example of the need to refine the model exchange rules
For example, a customer contacted us with the following problem: when synchronizing between ZUP and BP, it is not possible to transfer the data of the “Registration with the tax authority” directory, which are necessary to fill out the “Reflection of wages in accounting” document. Now the tabular part of this document on the side of the BP receiver contains an empty "Registration ..." and users have to manually create such entries in the directory. Agree, it's inconvenient. We can improve this point. 
Solution to the problem: we will finalize the conversion package from the exchange plan ExchangeSalary3Accounting3. Let's add to the standard "1C Exchange Rules" a new "Object Conversion Rule" (PKO) for the "Registration with the Tax Authority" directory and, accordingly, the "Property Conversion" of this directory (PKS). We will definitely finalize the standard "Rules for registering objects", because there was a need to register the directory changes on the exchange node. And we will revise the "1C Exchange Rules" of the correspondent's base.
Where will we edit this? to write and change the rules, we need the "1C: Data Conversion 2" configuration.
Refinement of standard conversion rules from the PZUP-BP exchange plan
So, let's start finalizing the 1C exchange rules by adding ExchangeSalary3Accounting3 to the composition in the configurator for the exchange plan new element- Directory of Registration in the Tax Authority. We will make this change in both configurations "1C: Salary and Enterprise Management 3" and "1C: Enterprise Accounting 3".

Save and update the configurations.
In the enterprise mode, for each database, we will upload a description of the metadata structure using the processing of MD83Exp.epf for the 1C:Enterprise 8.3 platform. Processing can be found in the "1C: Data Conversion" kit.
At the next stage, we will unload the conversion package from the ZUP and BP. The package should consist of 3 files: Registration Rules, Exchange Rules, Correspondent Exchange Rules.
Within the framework of this article, there will be no description of how data synchronization is configured, you can read it on the Coderline website in the Expert Articles section or watch webinar recordings. Now this option is already configured in the databases. Therefore, go to the synchronization settings (Administration -> Data synchronization -> Data synchronization settings), click the "Load rules" button. We will see the form "Rules for synchronization". Click the "More" button and select the "Save rules to file" option.

Here is a package after unloading we should get.
Let's do the same for the other information base"1C: Enterprise Accounting".
As a result, all the preparatory work for editing the rules is ready. We have:
Description of the metadata structure for loading into "1C: Data Conversion 2" (for ZUP and BP);
A conversion package that contains 1C exchange rules and registration rules required for uploading to 1C: Data Conversion 2 (for ZUP and BP).
Go to "1C: Data Conversion 2". Perform the following steps in order for both infobases:
Loading the metadata structures of our configurations;
We create conversions and load 1C data exchange rules from conversion packages (the rules file is called ExchangeRules);
Create registrations and load registration rules from conversion packages (rules file is called RegistrationRules).

We proceed directly to our refinement. We add a new object conversion rule (PKO) to the 1C exchange rules - the "Registration with the tax authority" reference book. We add a property conversion rule (PCS) for this directory and a data upload rule (PDS). This kind of refinement must be performed both for the rules from the ZUP package and for the exchange rules from the BP package. We unload our exchange rules into the corresponding files ExchangeRules.

Let's move on to the rules for registering a new element. We add the reference book "Registration with the tax authority". Upload the registration rules to the appropriate file from the RegistrationRules package. This action is also performed for both bases.

Modified exchange rules and registration rules are ready. Now we copy the contents of the exchange rules (ExchangeRules) from the BP package into the correspondent rules (CorrespondentExchangeRules) from the ZUP package. In the correspondent rules (CorrespondentExchangeRules) from the BP package, copy the contents of the exchange rules (ExchangeRules) from the ZUP package.
The result should be the following:
This completes the work in "1C: Data Conversion 2". The modified packages of conversion rules are ready, it remains to upload them back to the infobases and check the synchronization.
We archive the files from the packages to the ZIP archive and upload our conversion packages to the ZUP and BP.

All is ready. It remains to be tested.
Let's remember the conditions of the problem. It was necessary to register for unloading the directory "Registration with the tax authority" and check how the PM of the document "Reflection of wages in accounting" is filled out on the side of "1C: Enterprise Accounting 3".
In the source "1C: Salary and Enterprise Management 3" we register our directory for unloading. We perform synchronization. We go to the receiver database and also perform synchronization to receive data. Please note that now the necessary directory for registering changes has appeared in the exchange plan.

We check on the side of "1C: Enterprise Accounting 3":


Summarize. The result of the task was completed successfully. We have finalized the plan for the exchange of ZUP - BP, adding a new element for registering changes and completing the conversion rules for data synchronization.
Many entrepreneurs engaged in trading activities acquire two 1C: Accounting 8 programs at the same time to improve management efficiency. (hereinafter BP) and "1C: Trade Management 8" (hereinafter UT).
BP is used for maintaining regulated accounting and reporting, and UT - for operational and management accounting in company.
The success of sharing these software products largely depends on the organization of data exchange between the BP and UT configurations.
Understanding the following features of typical data exchange will help to avoid errors in the process of exchange between configurations and accounting violations in each configuration separately.
When writing this article, materials from the 1C documentation for software products were used. The method for setting up the exchange is described in detail in the htm-file " Sharing configurations Trade Management (11) and Enterprise Accounting ", which is located in the template catalog when installing both 1C: Accounting 2.0 (hereinafter BP) and 1C: Trade Management 11 (hereinafter UT); recommendations received at the partner conference 1C and personal experience the author on creating and changing exchange settings for clients of RG-Soft Project Consulting LLC.
1. Set up one-way or two-way exchange.
First of all, it should be noted that only documents related to cash and non-cash transactions can be uploaded from the BP configuration to the UT configuration. These include: Incoming cash order, Outgoing cash order, Receipt to the current account and Write-off from the current account. Goods movement documents created in the BP will not be uploaded to the UT.
Firm 1C recommends making an exchange with a bank in UT. “This will ensure full-fledged work with outgoing payment documents and more simple job with incoming documents. However, there was a situation when it was not possible to upload almost a single payment order from the client-bank file to the UT, while this file was completely uploaded to the BP.
This is due to the fact that more stringent checks on the content of the client-bank file have been added to the UT, for example: checking the completion of the TIN, checking the document number, the number must contain only numbers in accordance with the regulation of the Central Bank of October 3, 2002 N2-P "On cashless payments in Russian Federation(as amended March 3, 2003, June 11, 2004, May 2, 2007, January 22, 2008).
Setting up a one-way exchange (from UT to BP) makes sense only if all documents and reference information are filled in UT. Thus, duplication of elements in this database can be avoided.
To do this, you need to configure the following exchange scenario: create an exchange scenario in the UT configuration, in which only the unloading is saved (Fig. 1), in the BP configuration, create an exchange scenario and save only the download.
It must be taken into account that in such an exchange scenario, all additional documents and directories created in the BP will be registered for exchange, but will not be loaded into the UT, so it is recommended to periodically reset the registration, otherwise the exchange message file from the BP will constantly increase, slowing down the exchange process .
For this, it is recommended to use processing RegisterChangesForExchange82.epf, which can be found in the configuration delivery "Data conversion, rev. 2.1". After the configuration is installed, the processing is located in the update installation directory: ...\1c\Conversion\...version_number…
If the regulatory and reference information is filled in both in the UT and in the BP, then two-way exchange should be configured, but it may be necessary to track duplicates by starting the exchange in interactive mode instead of automatic (Fig. 2).

In order to limit data exchange only at the document level, it is not necessary to configure one-way exchange, it is enough to set a date in the exchange filter on the BP side that is greater than the date last document(See Fig. 5). But before setting the filter on the date, you need to make sure that the documents in the BP were not previously registered for exchange, otherwise the registered documents will be transferred to another database during the exchange.
Data Change Priority
If the exchange is first performed in the UT, and then in the BP, then the data downloaded from the UT will have priority. For example, in the UT they entered the document “Receipt to the current account”, launched the exchange first in the UT, then in the BP - the document appeared in the BP configuration. Then the accountant in the BP configuration made changes to this document. During the subsequent exchange, if the order of launching the exchange has not changed, then the changes made to the document will be overwritten by data from the UT.
For the correct exchange with those objects that are changed in both databases, 1C recommends organizing work so that the object is edited only in one of the databases. In another database, such an object should be opened only for viewing. To do this, you will need to use the setting of user access rights, but this approach guarantees the absence of collisions during the exchange, i.e. discrepancies that arise when an object changes in one or the other database, during the period between exchanges (Fig. 3).

2. Differences between BP and UT affecting metabolism
Counterparty agreements
In the UT configuration, there is no analytics for contracts of counterparties. All operations that are carried out in the UT configuration, when loaded into the BP configuration, are always executed under separate agreements created and controlled by the UT system itself.
If there is no contract with the required parameters in the BP configuration, then such a contract is created. It should be noted that the search for an agreement is carried out only from the number of agreements previously downloaded from the UT.
Management organization in UT
Starting with release 11.0.6.9, a predefined element "Management organization" appeared in the UT in the directory of the organization. This element must not be mapped to (or changed from) the current (single or one of) organization. You can read more about the use of this object in the documentation file "Changes and additions to documentation.htm" included in the delivery of UT.
Company structure
In UT for management accounting, the directory "Structure of the enterprise" is used, which contains a list of company divisions. When drawing up documents, the indication of the division of the enterprise is mandatory.
The elements of the "Enterprise Structure" directory are not mapped to the elements of the "Organization Units" directory in the BP. In order to prevent documents with an empty Subdivision attribute from being uploaded to the UT, it is necessary to fill in the default value in the exchange settings (Fig. 4).

Warehouse in the tabular section
If it is planned to use in UT new opportunity specifying warehouses in the tabular sections of documents, then in the settings of the exchange plan node it is necessary to set a generalized warehouse, which will be substituted when unloading documents from the UT to the BP configuration instead of the warehouses allowed for selection in the tabular parts of documents (Fig. 4).
Item type
When uploading data from the BP to the UT, the “item type” attribute is not filled in the nomenclature, this is due to the fact that the exchange serves the scenario when the nomenclature is created in the UT configuration, and not in the BP. In the documents for the movement of goods in the UT, there is no separate tabular section for accounting for services (services are filled in the goods table), therefore, in order for the services specified in the UT documents to be correctly transferred to the tabular section in the BP, you need to:
1. In the reference information section, open the “Types of item” reference book, go to the “services” item view - click “All actions” - enable editing and select Item Type - Service.
2. Change the item (service) - click "All actions" - allow editing and select this Item type with the Service type.
3. Setting up exchange filters (Fig. 5)

Changing the date of uploading (downloading) documents
1) Before moving the date forward, it is necessary to synchronize the databases by performing an exchange session so that the node does not have documents registered for exchange at the time the setting is changed. Otherwise, such documents, after changing the settings, as a result of unloading, may become marked for deletion in the receiving database, if they were previously uploaded there.
2) You can move the date back, because it only expands the area of the uploaded data. It is worth noting that in this case, documents from a previously closed period will not be automatically registered for exchange. In order to do this, you must either change the documents, or use the processing RegisterChangesForExchange82.epf.
Filter by organizations
Enabling this filter allows you to limit the list of organizations for which data exchange is allowed. The presence of the enabled filter affects both the unloading of the directory of organizations itself, and the unloading of other data related to organizations (directories and documents).
The principle of operation of the upload filters is as follows: the new settings apply to all data - at the time of the exchange creation, or only for those data that have been changed after the application of the new settings - after the exchange has been created, therefore it is recommended to approach the filter settings as responsibly as possible when creating the data exchange .
Example: when creating an exchange, the user set a filter by organization. Only data for the specified organization was uploaded to the receiving database. Further, the user decided that data on all organizations should be uploaded to the receiving database. But since the settings take effect only for newly changed data, the existing documents and directories will not be uploaded to the receiving database until the user makes any changes to them.
4. Removing objects from one of the databases
Mark for deletion
It is possible that the previously used element of the directory is not planned to be used for further accounting, and users consider it right to mark this directory for deletion. Objects marked for deletion do not participate in the exchange. This feature should be taken into account.
Removing duplicates
To remove objects that have arisen during the exchange of duplicates, we recommend using the processing Search&ReplaceValues.epf, which is located in the \1CITS\EXE\ExtReps\Unireps82\SearchAndChange\ directory on the ITS disk. And to check the correctness of the comparison of objects of two infobases, you can open the Information Register "Correspondence of infobase objects" and the entries in this register can be corrected manually. It is important to know that after deleting an object in one of the databases, the information register record will still have a match for the deleted object (broken link), you will either need to match another object or delete the record.
5. Additional settings
Cash flow items
To configure the UT, it may be necessary to put down the props “corr. account” for those items of cash flow that will be used and uploaded to the BP.
For BP configuration: you may need to enter the type of cash flow in the elements of the directory.
Users
Directory elements users can be transferred to another database if they are indicated as responsible in one of the objects participating in the exchange. For such objects, you will need to set permissions.
Base prefix and organization prefix
In UT, the prefix always has a fixed length and the separator (hyphen) "-". Therefore, if the infobase prefix is not specified or the organization prefix is not specified, then it is replaced with zeros. However, when setting up an exchange, the infobase prefix is always filled in on the CB (for UT) and on the BP (respectively for the BP configuration).
This solution is the standard for generating document numbers and object codes. The prefix has a fixed length and is separated by a hyphen from the document number. If in the future there will be several organizations in the database, then it will be enough to set prefixes for them and it will not be necessary to renumber all objects.
Error correction
In our article, the most important points organization of data exchange between "1C: Trade Management 8" rev.11 and "1C: Accounting 8" rev.2.0.
Specialists of RG-Soft Project Consulting LLC are ready to offer not only setting up the exchange for the accounting features of a particular organization, but also ways to correct errors in existing exchanges.
Tutorial on 1C Data Conversion (edition 2) Detailed acquaintance with the exchange rules
We know what exchange rules are and why they are needed. Let's get acquainted in more detail with the additional functionality of working with exchange rules. Let's open the settings for data exchange (conversion) rules:
The exchange rules define the source and destination configurations for data, in addition:
Tab "Advanced":

You can specify the default file name for saving the exchange rules, modules for uploading and downloading data for 7.7, the name of the exchange rules.
"Parameters" tab:
Suppose the office accepts orders exclusively for goods, so it is desirable to establish a ban on unloading services. If the item of the catalog Nomenclature has the requisite Service set to True, then it is guaranteed not to be unloaded. It is best to make control of the unloading of services optional immediately so as not to change the rules if the remote office begins to accept orders for services as well.
For this case, we will have to learn two new tricks for working with the "Data Conversion" configuration - using handlers and setting parameters.
Parameters are a specialized data structure in upload algorithms that can be used to access processing variables. Setting the structure of parameters for conversion rules is carried out in the "Data Conversion" configuration, and setting parameter values is possible in the form of processing data upload and download.
To edit the parameters, open the form of the element of the Conversions directory for editable exchange rules and go to the parameters tab. Let's create a new element of the Parameters directory. Let's assign the name of the parameter - Unload Services. The parameter name is used to refer to it in the Parameters structure when writing program code in handlers. The name will be displayed in the tabular section of the Parameters in the form of processing the universal data exchange. In order for the parameter to be visible in the dialog when setting up unloading, you need to check the "Set in dialog" box and select the type of parameter value. To work with parameters in the dialog, you must also check the box "Upload parameters in version 2.01 format" in the form of an element in the Conversions lookup.

It is not enough just to specify the parameters, it is necessary that the unloading algorithm "understand" in which case to unload the element, and in which not. For such (and many other) cases, the handler mechanism is used. Its essence lies in the fact that at the key points in the execution of all the basic algorithms for uploading and downloading data, the code written by the developer when creating the exchange rules is processed. Naturally, the use of such a delicate tool requires caution and thoughtfulness. Before writing your own handlers, we recommend that you carefully read the help for the "Data Conversion 2.0" configuration, which describes all the variables available in the handlers and how to use them, as well as lists the types of handlers and the features of their call in data exchange algorithms.
For our purpose, we need to use the "Before Unload" unload rule handler. Open the Nomenclature data upload rule and place the following program code in the "Before upload" field on the "Events" tab:

What does our handler do? When writing the program code, we used the variables of data unloading algorithms. The Parameters structure is used to refer to the UploadServices parameter, which is set in the data exchange processing form. The object variable provides access to the object being unloaded. And the Refusal variable allows you to control the refusal to unload the current object. The handler is executed just before the object is unloaded, which makes it possible to cancel the unloading of the object.

ONLY FOR EXCHANGE V8 - V8 AND PROCESSING DOWNLOAD AND DOWNLOAD NOT BELOW 2.0.18.1
It is possible to pass parameters from one configuration to another. To do this, on the "Parameters" tab, check the box "Transfer parameter when unloading" and this parameter will be placed in the exchange file and its value can be accessed when loading data. You can specify a conversion rule for a parameter, according to which the values will be converted. Using the "Transmit parameter when uploading" checkbox, you can only transfer those parameters that are edited in the dialog when uploading data. If you need to pass a parameter that is not present in this dialog, then you need to call the procedure:
The Unloading parameters tab now has a parameter, changing the values of which services are either unloaded or not unloaded.
In this article, I will describe how a typical data exchange between BP 3.0 and UT 10.3 is configured. (exchange with BP 3.0 is available starting from release 10.3.20)
I set up the exchange according to the following requirements: the movement of goods in batches should be transferred to the BP; only information on bank movements is unloaded from the BP.
To set up an exchange, follow these steps:
1. Determine from which database the first unloading will be made. In principle, you can do the first unloading from any database, for example, I did the first unloading from UT 10.3. To do this, in UT you need to do:
1.1. In the accounting settings, check the box "Use data exchange" and specify "IB prefix" (unlike BP 2.0, the number of characters in the prefix is limited to 2).
1.2. Launch the assistant for creating an exchange plan ("Tools->Data exchange with products on the 1C: Enterprise 8.2 platform->Data exchanges") by clicking the "Set up data synchronization" button.
I will only briefly describe the configuration steps in the assistant:
a) "Selecting the data synchronization setup step", there are two options for creating a new exchange plan or continuing an already created one, in my case in UT 10.3 I choose to create a new one, and in accounting continue the settings.

b) The data transfer method is selected, I use a file in a shared folder.


c) Setting synchronization parameters, here you need to specify the name of another database (not necessarily exactly, I indicated "BP") and prefix (here you need to specify it exactly), and you must also specify parameters related to the upload rule (such as "Start date for uploading documents" , "Upload analytics by warehouse", "Reschedule write-off cost", configure upload selections, etc.)


2.1. In the program settings (Section "Administration", item "Program settings"), you must set the "Use data synchronization" flag on the "data synchronization" tab.

2.2. Launch the exchange plan creation assistant (Section "Administration", item "Data synchronization"). Click the "Set up data synchronization" button and select the type of synchronization UT 10.3.

2.3. The helper says:
a) Settings file saved from the UT 10.3 database (see section 1.3.(d)) This file stores data about the configuration name, prefix, connection method.

b) Setting the synchronization parameters. It specifies: "Exchange mode" (one-sided or two-sided, I'm only interested in two-sided), "Start date for uploading documents", "Filtering by organization", "Setting default values".

2.4. During the first load, the user will be given the option to manually enter unmapped data ( given function will be available when synchronized with additional options, both in UT and in BP).
After the first exchange, synchronization is considered completed, but data exchange settings are available, as well as additional functionality for working with the exchange. To correct it, you must click the Change button on the synchronization form.

Here are some particularly important features:
1. "Load object conversion rules", here it is possible to set a file with exchange rules. To work with them, you need to use the "Data Conversion" configuration. In this configuration, it is possible to load, modify, compare with each other (an important function when updating), save conversion rules.


2. "Loading object registration rules", here you can specify a file with registration rules. To adjust the rules, the "Data Conversion" configuration is also used. These rules can be configured additional terms to register objects in the database for the purpose of participating in the exchange.

3. "Message transport settings", here you can change the connection settings for the exchange (for example, the folder or ftp resource used for the exchange has changed).

4. "Get synchronization settings for another program", in this item it is possible to re-upload the settings file for another configuration.

5. "Composition of sent data" (This item is available only in BP 3.0, in UT 10.3 the function of this functionality is implemented by the built-in processing "Change registration for exchange") Using this function, it is possible to change, delete the registration of configuration objects in the exchange.

6. "Delete synchronization setting", deletes the setting.
7. Synchronization with additional parameters. Here you can manually configure the mapping of the transmitted data. Also add additional documents for exchange.
