Below you will find 20 basic examples of using the Nmap command.
You will learn how to use Nmap from command line in linux to search for active hosts on the network and scan open ports.
You will see how remotely detect operating system using TCP/IP stack fingerprints and how check software version running on a remote server.
I will also show you how to use Nmap to implement covert scanning, how define firewall And How change MAC address.
1. Scan Single Host or IP Address
Scan Separate IP Address:
$ nmap 192.168.1.1
Scan server by Host name:
$ nmap server.site
Increase Level of detail scan results:
$ nmap -v server..site
2. Scanning Multiple IP Addresses
Scan Multiple IP Addresses:
$ nmap 192.168.1.1 192.168.1.2 192.168.1.3 $ namp 192.168.1.1,2,3
Scan Subnet:
$ nmap 192.168.1.0/24 $ nmap 192.168.1.*
Scan Range of IP Addresses (192.168.1.0 — 192.168.1.200):
$ nmap 192.168.1.0-200
3. Search for Active Computers on the Network
Useful advice: Scan the network with just one ping command! Calculate all active computers!
Scan the network in search Active Hosts:
$ nmap -sn 192.168.1.0/24
4. Scanning a List of Hosts from a File
Scan a list of hosts/networks from File:
$ nmap -iL input.txt
File format:
# Entries can be in any of the formats that # Nmap works with from the command line (IP addresses, hostnames, CIDR, IPv6, or octet # ranges). Entries must be separated by one or more spaces, tabs # or newlines. $ cat input.txt server.site 192.168.1.0/24 192.168.2.1,2,3 192.168.3.0-200
5. Excluding IP/Hosts/Networks from Scanning
Exclude Goals from Nmap scan:
$ nmap 192.168.1.0/24 --exclude 192.168.1.1 $ nmap 192.168.1.0/24 --exclude 192.168.1.1 192.168.1.5 $ nmap 192.168.1.0/24 --exclude 192.168.1.1,2,3
Exclude List hosts taken from the file:
$ nmap 192.168.1.0/24 --excludefile exclude.txt
The file format with excluded hosts is the same as above.
6. Scan Specific Ports
Scan One Port:
$ nmap -p 80 192.168.1.1
Scan Multiple Ports:
$ nmap -p 80,443 192.168.1.1
Scan Port Range:
$ nmap -p 80-1000 192.168.1.1
Scan All Ports:
$ nmap -p "*" 192.168.1.1
Scan a few of the most Common Ports:
$ nmap --top-ports 5 192.168.1.1 $ nmap --top-ports 10 192.168.1.1
7. Definition of Supported IP Protocols
Determine which IP Protocols(TCP, UDP, ICMP, etc.) supports scanned host:
$ nmap -sO 192.168.1.1
8. Scan TCP/UDP Ports
Scan all TCP Ports:
$ nmap -sT 192.168.1.1
Scan certain TCP ports:
$ nmap -p T:80 192.168.1.1
Scan all UDP ports:
$ nmap -sU 192.168.1.1
Scan specific UDP ports:
$ nmap -p U:53 192.168.1.1
Combining scans of different ports:
$ nmap -p U:53,79,113,T:21-25,80,443,8080 192.168.1.1
9. Quick Scan
Activate Quick Mode scanning:
$ nmap -F 192.168.1.1
* Scans fewer ports than regular scanning.
10. Show Port Status Reason
Show reason, by which Nmap considers that the port is in a certain state:
$ nmap --reason 192.168.1.1
11. Show Only Open Ports
Show Only Open Ports(or possibly open):
$ nmap --open 192.168.1.1
12. OS definition
One of the most famous functionality Nmap is a remote OS detection based on the analysis of the TCP / IP stack.Nmap sends a series of TCP and UDP packets to a remote host and examines the responses.
After running a lot of tests, Nmap compares the results with its database and, if it finds a match, displays information about the OS.
Turn on OS definition:
$ nmap -O 192.168.1.1
13. Determining the Version of the Services
Turn on Determining the Version of Services:
$ nmap -sV 192.168.1.1
* Determines the versions of programs running on the remote server.
14. Firewall detection
Find out if your computer is protected by any Packet Filters or firewall:
$ nmap -sA 192.168.1.1
15. MAC Address Spoofing
Change MAC Address a:
$ nmap --spoof-mac 00:11:22:33:44:55 192.168.1.1
Change MAC Address Random MAC:
$ nmap --spoof-mac 0 192.168.1.1
16. Firewall Scan for Vulnerabilities
These three scan types use a subtle loophole in the TCP RFC to separate open and closed ports.When an RFC compliant system is being scanned, any packet that does not contain a SYN, RST, or ACK bit set will result in an RST being sent in response if the port is closed, or will result in no response if the port is open.
Because none of these bits is set, then any combination of the remaining three (FIN, PSH, and URG) will be valid.
TCP Null scanning:
$ nmap -sN 192.168.1.1
* No bits (Flags in TCP Header 0) are set.
TCP Fin scanning:
$ nmap -sF 192.168.1.1
* Only the TCP FIN bit is set.
TCP Xmas scanning:
$ nmap -sX 192.168.1.1
* The FIN, PSH and URG flags are set (the package lights up like a Christmas tree).
17. Hidden Scan
Useful advice: Stay anonymous during port scans! Use Nmap + Tor + ProxyChains! Safe and easy penetration testing!
TCP SYN scanning:
$ nmap -sS 192.168.0.1
* Known as half-open connection scanning, as it does not open full TCP connections.
18. Disable Host Discovery (No Ping)
Do not ping hosts before scanning:
$ nmap -Pn 192.168.1.1
19. Disable DNS usage
Useful advice: Need to tighten security on Linux? Encrypt DNS traffic to protect against spoofing!
Never perform reverse DNS resolution for each active IP address found.
nmap[ <Тип сканирования> ...] [ <Опции> ] { <цель сканирования> }
Description
nmap(" Network Mapper ») is a utility with an open source code for network exploration and security testing. It was designed to quickly scan large networks, although it also works well for single targets. Nmap uses raw IP packets in an original way to determine what hosts are available on the network, what services (application name and version) they offer, what operating systems (and OS versions) they use, what types of packet filters/firewalls are used, and many more. other characteristics. While Nmap is commonly used for security checks, many system administrators find it useful for common tasks such as monitoring network structure, managing service startup schedules, and keeping track of host or service uptime.
The output of Nmap is a list of scanned targets with additional information for each of them depending on the given options. The key information is « important ports table» . This table contains the port number, protocol, service name, and status. The status can be open (open), filtered (filtered), closed (closed), or unfiltered (not filtered). Open means that the application on the target machine is ready to connect/receive packets on this port. Filtered means that the firewall, network filter, or some other network interference is blocking the port, and Nmap cannot determine whether the port is open or closed. Closed ports are not associated with any application, but can be opened at any time. Ports are considered unfiltered when they respond to Nmap requests, but Nmap cannot tell if they are open or closed. Nmap issues open|filtered and closed|filtered combinations when it cannot determine which of the two states the port describes. This table may also provide details of the software version if requested. When scanning over IP protocol (-sO), Nmap provides information about supported protocols, not about open ports.
In addition to a table of important ports, Nmap can provide further target information: resolved DNS names, operating system guess, device types, and MAC addresses.
A typical scan using Nmap is shown in Example 1. The only arguments used in this example are -A , for OS version, scripted scanning, and tracing; -T4 for faster execution; then two target hosts.
Example 1. A typical example of scanning with Nmap
# nmap -A -T4 scanme..org) Interesting ports on scanme.site (64.13.134.52): (The 1663 ports scanned but not shown below are in state: filtered) PORT STATE SERVICE VERSION 22/tcp open ssh OpenSSH 3.9p1 (protocol 1.99) 53/tcp open domain 70/tcp closed gopher 80/tcp open http Apache httpd 2.0.52 ((Fedora)) 113/tcp closed auth Device type: general purpose Running: Linux 2.4.X|2.5.X| 2.6.X OS details: Linux 2.4.7 - 2.6.11, Linux 2.6.0 - 2.6.11 Interesting ports on playground..168.0.40): (The 1659 ports scanned but not shown below are in state: closed) PORT STATE SERVICE VERSION 135/tcp open msrpc Microsoft Windows RPC 139/tcp open netbios-ssn 389/tcp open ldap? 445/tcp open microsoft-ds Microsoft Windows XP microsoft-ds 1002/tcp open windows-icfw? 1025/tcp open msrpc Microsoft Windows RPC 1720/tcp open H.323/Q.931 CompTek AquaGateKeeper 5800/tcp open vnc-http RealVNC 4.0 (Resolution 400x250; VNC port: 5900) 5900/tcp open vnc VNC (protocol 3.8) MAC Address: 00:A0:CC:63:85:4B (Lite-on Communications) Device type: general purpose Running: Microsoft Windows NT/2K/XP OS details: Microsoft Windows XP Pro RC1+ through final release Service Info: OSs: Windows , Windows XP Nmap finished: 2 IP addresses (2 hosts up) scanned in 88.392 seconds
most new version Nmap can be downloaded from
There are four types of NSE scripts, namely:
- Prerule scripts– are scripts that run before any of Nmap's scan operations, they are executed when Nmap hasn't gathered any information about a target yet.
- host scripts– are scripts executed after Nmap has performed normal operations such as host discovery, port scanning, version detection, and OS detection against a target host.
- Service scripts– are scripts run against specific services listening on a target host.
- Postrule scripts– are scripts run after Nmap has scanned all of its target hosts.
Then these scripts are grouped under various categories including those for authentication ( auth), discovering of hosts ( broadcast), brute force attacks to guess authentication credentials ( brute), discovering more about a network ( discovery), causing a denial of service ( dos), exploiting some vulnerability ( exploit), etc. A number of scripts belong to the default category.
note: Before we move any further, you should take a note of these key points:
- Do not execute scripts from third parties without critically looking through them or only if you trust the authors. This is because these scripts are not run in a sandbox and thus could unexpectedly or maliciously damage your system or invade your privacy.
- Secondly, many of these scripts may possibly run as either a prerule or postrule script. Considering this, it is recommended to use a prerule for purposes of consistency.
- Nmap uses the scripts/script.db database to figure out the available default scripts and categories.
To see the location of all available NSE scripts, run the on the terminal, like this:
$ locate *.nse/usr/share/nmap/scripts/acarsd-info.nse /usr/share/nmap/scripts/address-info.nse /usr/share/nmap/scripts/afp-brute.nse /usr/share/nmap/scripts /afp-ls.nse /usr/share/nmap/scripts/afp-path-vuln.nse /usr/share/nmap/scripts/afp-serverinfo.nse /usr/share/nmap/scripts/afp-showmount.nse /usr/share/nmap/scripts/ajp-auth.nse /usr/share/nmap/scripts/ajp-brute.nse /usr/share/nmap/scripts/ajp-headers.nse /usr/share/nmap/scripts /ajp-methods.nse /usr/share/nmap/scripts/ajp-request.nse /usr/share/nmap/scripts/allseeingeye-info.nse /usr/share/nmap/scripts/amqp-info.nse /usr /share/nmap/scripts/asn-query.nse ...NSE scripts are loaded using the --script flag, which also allows you to run your own scripts by providing categories, script file names, or the name of directories where your scripts are located.
The syntax for enabling scripts is as follows:
$ namp -sC target #load default scripts OR $ nmap --script filename|category|directory|expression,... target
You can view a description of a script with the --script-help option. Additionally, you can pass arguments to some scripts via the --script-args and --script-args-file options, the later is used to provide a filename rather than a command line arg.
To perform a scan with most of the default scripts, use the -sC flag or alternatively use --script=default as shown.
$ nmap -sC scanme.nmap.org OR $ nmap --script=default scanme.nmap.org OR $ nmap --script default scanme.nmap.org
sample output
Starting Nmap 7.01 (https://nmap.org) at 2017-11-15 10:36 IST Nmap scan report for scanme.nmap.org (45.33.32.156) Host is up (0.0027s latency). Not shown: 999 filtered ports PORT STATE SERVICE 80/tcp open http |_http-title: Go ahead and ScanMe! Nmap done: 1 IP address (1 host up) scanned in 11.74 secondsTo use a script for the appropriate purpose, you can first of all get a brief description of what it actually does, for instance http headers.
$ nmap --script-help http-headers scanme.nmap.org
sample output
Starting Nmap 7.01 (https://nmap.org) at 2017-11-15 10:37 IST http-headers Categories: discovery safe https://nmap.org/nsedoc/scripts/http-headers.html Performs a HEAD request for the root folder ("/") of a web server and displays the HTTP headers returned.Loading NSE Scripts To Perform Nmap Scans
You can select or load scripts to perform a scan in different methods explained below.
Using Script Name
Once you know what a script does, you can perform a scan using it. You can use one script or enter a comma-separated list of script names. The command below will enable you view the HTTP headers configured on the web server at the target host.
$ nmap --script http-headers scanme.nmap.org
Scan HTTP Headers
Starting Nmap 7.01 (https://nmap.org) at 2017-11-15 10:39 IST Nmap scan report for scanme.nmap.org (45.33.32.156) Host is up (0.27s latency). Not shown: 996 closed ports PORT STATE SERVICE 22/tcp open ssh 80/tcp open http | http headers: | Date: Wed, 15 Nov 2017 05:10:04 GMT | Server: Apache/2.4.7 (Ubuntu) | Accept-Ranges: bytes | Vary: Accept-Encoding | Connection: close | Content Type: text/html | |_ (Request type: HEAD) 179/tcp filtered bgp 31337/tcp open Elite Nmap done: 1 IP address (1 host up) scanned in 20.96 seconds
Using Categories
You can also load scripts from one category or from a comma-separated list of categories. In this example, we are using all scripts in the default and broadcast category to carry out a scan on the host 192.168.56.1 .
$ nmap --script default,broadcast 192.168.56.1
Using *Wildcard
This is useful when you want to select scripts with a given name pattern. For example to load all scripts with names starting with ssh, run the command below on the terminal:
$ nmap --script "ssh-*" 192.168.56.1
Using Boolean Expressions
You can also select scripts using boolean expressions which you can build using the and, or, and not operators. And names in a Boolean expression may be a category, a filename from script.db, or all.
The following command will load scripts from the default or broadcast categories.
$ nmap --script "default or broadcast" 192.168.56.10
Which is equivalent to:
$ nmap --script default,broadcast 192.168.56.10
To load all scripts omitting those in the vuln category, run this command on the terminal.
$ nmap --script "not vuln" 192.168.56.10
The next command looks a little complicated but it is easy to understand, it selects scripts in the default, or broadcast categories, leaving out those with names starting with ssh-:
$ nmap --script "(default or broadcast) and not ssh-*" 192.168.56.10
Importantly, it is possible to combine categories, script names, a directory containing your custom scripts or a boolean expression to load scripts, like this:
$ nmap --script broadcast,vuln,ssh-auth-methods,/path/to/custom/scripts 192.168.56.10
Passing Arguments to NSE Scripts
Below is an example showing how to pass arguments to scripts with the --script-args option:
$ nmap --script mysql-audit --script-args "mysql-audit.username="root", \ mysql-audit.password="password_here", mysql-audit.filename="nselib/data/mysql-cis. audit""
To pass a port number, use the -p nmap option:
$ nmap -p 3306 --script mysql-audit --script-args "mysql-audit.username="root", \ mysql-audit.password="password_here" , mysql-audit.filename="nselib/data/mysql -cis.audit""
This above command runs an audit of the MySQL database server security configuration against parts of the CIS MySQL v1.0.2 benchmark. You can as well create your own useful custom audit files for other MySQL audits.
That's it for now. You can find more information in the nmap man page or check out NSE Usage .
To get started with writing your own NSE scripts, check out this guide: https://nmap.org/book/nse-tutorial.html
Conclusion
nmap is a really powerful and useful tool that every system or network administrator needs in his/her security arsenal – NSE simply adds more efficiency to it.
In this article, we introduced you to the Nmap Script Engine, and looked at how to find and use the various available scripts under different categories. If you have any questions, do not hesitate to write back to us via the comment form below.
Nmap is a very popular open source network scanner that can be used on both Windows and Linux. Nmap or Network Mapper was developed by Gordon Luon and is currently used by security professionals and system administrators around the world.
This program helps system administrators very quickly understand which computers are connected to the network, find out their names, and also see what software is installed on them, what operating system and what types of filters are applied. The functionality of the program can be extended with its own scripting language, which allows administrators to automate many actions.
For example, scripts can automatically detect new security vulnerabilities in your network. Namp can be used with good or bad intentions, be careful not to use nmap against the law. In this tutorial, we'll look at how to use namp to scan ports on the Linux operating system. But first you need to try to understand how this utility works.
In computer networks, all connected devices have their own IP address. Each computer supports the ping protocol, which can be used to determine whether it is connected to the network. We simply send a ping request to the computer, and if it responds, we assume that it is connected. Nmap takes a slightly different approach. Computers also react in a certain way to certain network packets, the utility simply sends the necessary packets and looks at which hosts sent the answer.
But you probably already know about this. More interesting is how Nmap knows which services are running on the machine. The essence of the work of all network programs is based on ports. To receive a message from the network, the program must open a port on your computer and wait for incoming connections. And to send a message over the network, you need to connect to another program (destination) port. The program will then need to open a port on which it will wait for a response.
The nmap utility iterates through the available range of ports during a network scan and tries to connect to each of them. If the connection is successful, in most cases, by sending several packets, the program can even find out the version of the software that is waiting for connections on this port. Now that we've covered the basics, let's look at how to use nmap for port and network scanning.
Nmap Syntax
The Nmap launch command is very simple, just pass it the target IP address or network in the parameters, and specify the options if necessary:
$ nmap address options
Now let's look at the main options that we will need in this article.
- -sl- just create a list of running hosts, but don't scan nmap ports;
- -sP- only check if the host is reachable using ping;
- -PN- consider all hosts available, even if they do not respond to ping;
- -sS/sT/sA/sW/sM- TCP scanning;
- -sU- UDP scanning nmap;
- -sN/sF/sX- TCP NULL and FIN scan;
- -sC- run the default script;
- -sI- lazy indle scanning;
- -p- specify the range of ports to check;
- -sV- a detailed study of ports to determine the versions of services;
- -O- determine the operating system;
- -T- scanning speed, the more, the faster;
- -D- mask scanning using fictitious IPs;
- -S- change your IP address to the specified one;
- -e- use a specific interface;
- --spoof-mac- set your MAC address;
- -A- detection of the operating system using scripts.
Now that we've covered all the basic options, let's talk about how nmap port scans work.
How to Use Nmap to Scan Ports in Linux
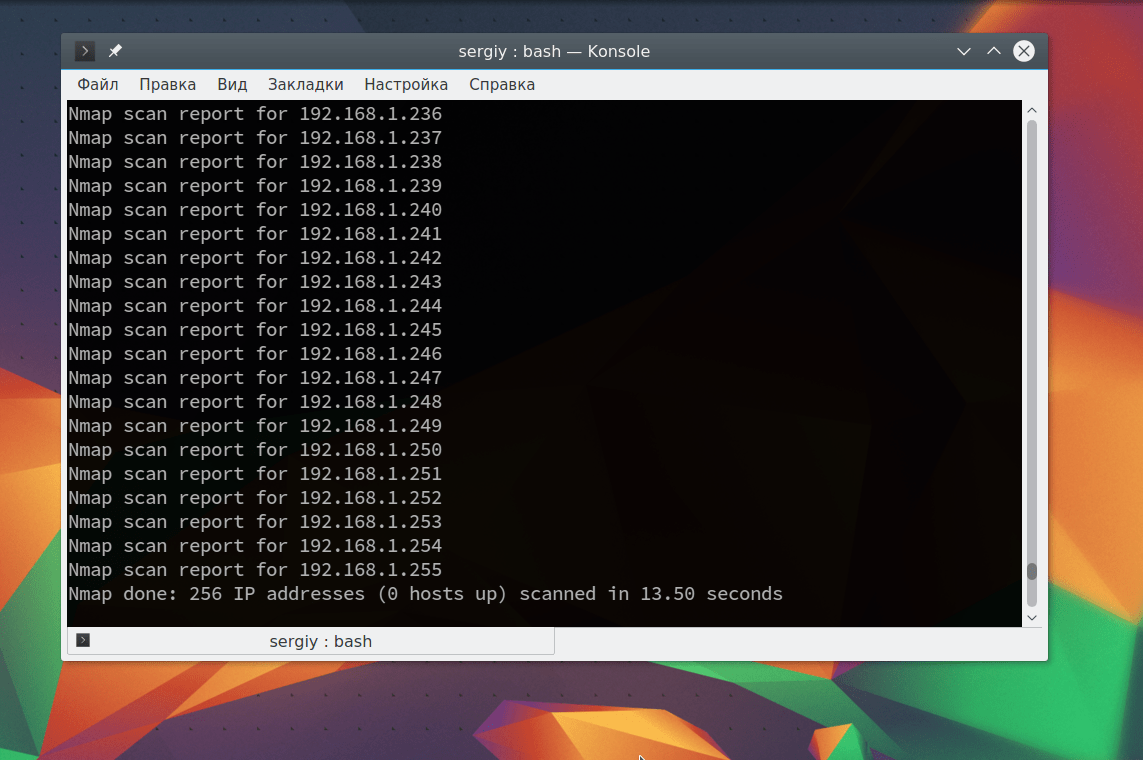
Let's look at nmap examples next. First, let's look at how to find all devices connected to the network, for this it is enough to use the -sL option and specify our network mask. in my case it is 192.168.1.1/24. You can find your local network mask by running the command:
From the output for the interface used, take the number after the slash, and before the slash, specify the ip of your router. The nmap network scan command will look like this:
nmap -sL 192.168.1.1/24
Sometimes this scan may not return any results because some operating systems have port scan protection. But this can be bypassed by simply using ping to scan all ip addresses on the network, for this there is the -sn option:
nmap -sn 192.168.1.1/24

As you can see, now the program has detected active devices on the network. Next, we can scan nmap ports for the desired host by running the utility without options:
sudo nmap 192.168.1.1

Now we can see that we have several ports open, all of them being used by some service on the target machine. Each of them can be potentially vulnerable, so it is not safe to have many open ports on a machine. But this is not all that you can do, further you will learn how to use nmap.
To find out more detailed information about a machine and the services running on it, you can use the -sV option. The utility will connect to each port and determine all available information:
sudo nmap -sV 192.168.1.1

We have ftp running on our machine, so we can try to explore this service in more detail using standard nmap scripts. Scripts allow you to check the port in more detail, find possible vulnerabilities. To do this, use the -sC option and -p to set the port:
sudo nmap -sC 192.168.56.102 -p 21
We ran the default script, but there are other scripts, for example, you can find all scripts for ftp with the command:
sudo find /usr/share/nmap/scripts/ -name "*.nse" | grep ftp
Then we will try to use one of them, for this it is enough to specify it using the --script option. But first, you can look at the information about the script:
sudo nmap --script-help ftp-brute.nse

This script will try to determine the FTP login and password on the remote host. Then run the script:
sudo nmap --script ftp-brute.nse 192.168.1.1 -p 21

As a result, the script picked up the login and password, admin/admin. That's why you don't need to use the default login options.
You can also run the utility with the -A option, which activates a more aggressive mode of the utility, with which you will get most of the information with one command:
sudo nmap -A 192.168.1.1

Note that almost all of the information we've seen before is included here. It can be used to increase the defense of this machine.
conclusions
In this article, we looked at how nmap port scanning is performed, as well as several simple examples using this utility. These nmap commands can be useful to many system administrators to improve the security of their systems. But this is not all the possibilities of the utility. Keep experimenting with the utility to find out more just not on other people's networks!
about the author
Founder and administrator of the site site, I am fond of open source software and the Linux operating system. I currently use Ubuntu as my main OS. In addition to Linux, I am interested in everything related to information technology and modern science.
Nmap is a cult scanner that almost no hacker can do without, so the topic of expanding its capabilities, I think, is of interest to many. Using other tools in conjunction with Nmap is a common practice. This article will talk about how to easily automate Nmap with your favorite tools. It is more convenient to “press one button” and get the result than to constantly do the same sequence of actions. Using scripts in Nmap can help hackers hack systems more automatically, and sysadmins can check systems for default holes and fix them in a timely manner.
A few words about Nmap
I am sure that most readers of Hacker magazine know what Nmap is and have probably used it more than once to explore the network and collect information. For those who have forgotten or do not know, just in case, let me remind you:
- Nmap is a cross-platform tool for scanning the network, checking its security, determining OS versions and various services, and much more. This is a very flexible and easily extensible utility, and the NSE scripting engine makes it so;
- NSE (Nmap Scripting Engine) is a powerful Nmap component that allows users to write scripts to automate a wide range of network tasks: more flexible interaction with existing Nmap capabilities, detection and exploitation of vulnerabilities, and more. NSE is based on the Lua language interpreter;
- Lua is a scripting language similar to JavaScript.
Formulation of the problem
As already mentioned, today we will be expanding the functionality of Nmap by writing our own scripts. Any hack/pentest usually starts with reconnaissance and data collection. One of the first checks is the presence of open ports on the host under study and the identification of running services. The best tool to collect such information than Nmap, perhaps not. The next step after scanning is usually either searching for a sploit for the found vulnerable service, or selecting a login:password pair using the brute force method.
Let's say you actively use the THC-Hydra brute-forcer to guess the passwords of several services (for example, HTTP-Basic, SSH, MySQL). In this case, you have to set the hydra on each service separately, you need to remember the features of the services and the flags necessary to launch the hydra. And if it becomes necessary to brute much more than five services? .. Why not automate it?
Therefore, let's write a simple script that will automate the process of starting Hydra to select logins / passwords for one service (for example, PostgreSQL). For this we need the following tools:
- nmap;
- THC-Hydra;
- any text editor.
If you don't already have Nmap and/or Hydra installed, fix it immediately:
$ sudo apt-get install nmap hydra
Okay, let's start. The scripts for Nmap are the usual text files with *.nse extension. So open up your favorite text editor and create a new file. I will use Vim:
$ vim hydra.nse
NSE script structure
Before moving on to writing, it must be said that all scripts have a certain structure. In addition to the code itself, which automates certain actions, it contains a description of the script (what it is intended for and how to use it), information about the author, licenses, dependence on other scripts, categories to which the script belongs, and so on. Let's take a closer look at each of these parts.
Description of the script (description)
This section contains a description of the script, comments by the author, an example of displaying the result of the script execution on the screen, and additional features.
For our script that selects logins / passwords for PostgeSQL, the description will look like this:
Description = [[ Brute force all services running on a target host. The results are returned in a table with each path, detected method, login and/or password. ]] --- -- @usage -- nmap --script hydra [--script-args "lpath=
Comment; -- - multi-line comment; @usage, @output, @args - an example of calling a script, displaying the result on the screen, the necessary arguments when calling.
Above in @usage we see the script launch format. In this case, only the name of the script (hydra) is specified. This becomes possible if the script is placed in the directory /
Categories where the script is located (categories)
When writing an NSE script, you can specify its category (or several categories). This is useful when the Nmap user wants to use not a specific script, but a set of scripts that are in the same category. Examples of some categories:
- auth - a category in which scripts define the authentication data of the target host;
- brute - a category whose scripts help determine logins and passwords for various services;
- default - a category that contains the main scripts. There are some criteria that determine whether a script belongs to this category: scanning speed, usefulness, reliability, confidentiality, visual output;
- malware - a category that helps identify malware.
For example, if you need to run all scripts from the auth category, then the command will look like this:
$ nmap --script=auth example.com
In this case, the scripts of this category will be run in turn for the specified host. Our script belongs to the brute category. Let's add the following line to the file:
Categories = ("brute")
Information about the author (author)
Each script contains information about its author. In my case:
Author = "Olga Barinova"
Information about the license in use (license)
Nmap welcomes all user developments and encourages sharing, including NSE scripts. When specifying a license, you confirm the right to share the script with the community. The standard Nmap license looks like this:
License = "Same as Nmap--See http://nmap.org/book/man-legal.html"
Let's add this line to our script as well.
Dependencies on other scripts (dependencies)
This area contains the names of NSE scripts that must be executed before this script can be run in order to obtain the necessary information. For example,
Dependencies = ("smb-brute").
In our case, this feature will not be needed, so we will not add dependencies.
Host and port (host & port)
Nmap needs to know for which services and on which ports to run the script. There are special rules for this:
- prerule() - script is executed once before scanning any host, used for some network operations;
- hostrule(host) - the script is executed for each host from the table, which it takes as an argument;
- portrule(host, port) - the script is executed for each host and for each port from the tables that it takes as arguments;
- postrule() - the script is executed once after scanning any host. It is mainly used for processing the results, summarizing statistics and the like.
There are libraries for the formation of such rules. Our script only needs to specify the port number (5432) and the service name (postgresql), and then it will work only for this port and service. There is a fairly popular shortport library built into the NSE that includes various methods. We will use the method
Port_or_service (ports, services, protos, states)
where ports are port numbers, services are service names, protos are protocol names (for example, udp), states are states.
This method returns true if the service currently being parsed is on one of the ports in the ports list or matches any service in the services list, and the protocol and status are checked for a match, otherwise false is returned.
To make our script work with PostgreSQL, we need to add the port number and service name:
Portrule = shortport.port_or_service((5432), ("postgresql"))
Connecting Libraries
Let's digress for a second from the structure of the script and consider how external libraries are connected, the functionality of which we need to access.
Continued available to members only
Option 1. Join the "site" community to read all the materials on the site
Membership in the community during the specified period will give you access to ALL Hacker materials, increase your personal cumulative discount and allow you to accumulate a professional Xakep Score rating!