


 Back forward
Attention! Preview slides are for informational purposes only and may not represent the full extent of the presentation. If you are interested this work please download the full version.
The purpose of the lesson: introduce students to gradient masks and show how they can be used to create a collage.
Lesson type: combined lesson.
Tutorials:
- consolidate the ability to work with image layers in Gimp;
- consolidation of practical skills in working with selection tools, gradient, brush, scaling and moving image fragments;
- get the first concept of the Quick Mask;
- learn how to use the Quick Mask to select objects;
- teach how to combine pictures;
developing:
- develop work skills; develop skills to overcome difficulties in independent work with software product;
- develop artistic taste;
educational:
- education of the ability for creative artistic and aesthetic activities;
- education of accuracy, patience, perseverance.
Lesson objectives.
- Learn how to use familiar tools in a new way.
- Develop students' creativity
- Learn to create an elementary collage.
Necessary equipment and materials:
Computers with Microsoft PowerPoint installed on them and Gimp 2.66, Adobe Flash Player, multimedia projector, screen or interactive whiteboard, computer presentation “Sozdanie_kollazha”, computer presentation “Test”, didactic handout, photo set, camera, flash movie 3_sposob_gradient.
Lesson plan.
- Organizing time. 1 minute.
- Checking d / s 5 min.
- Updating knowledge 6 min.
- Frontal survey on the passed material.
- Test.
- Problem statement and research.
During the classes
Student motivation.
Homework to create a drawing using brushes. Before class, students transfer their homework files to a shared network folder.
1. Organizational moment.
Greeting, checking readiness for the lesson, checking absentees.
2. Home check tasks.
In the last lesson, we started to study the graphics editor? Gimp. And your homework was to create a landscape using the GR.RED brush tool. All your work you gave me over the network at recess. Who wants to show and comment on their work.
Two students are called in turn to show their work and comment on which brushes they used to create their work and why. What were the difficulties.
Thank you sit down. The next student is called.
3. Actualization of knowledge.
A face-to-face survey is being conducted.
What graphic editors do you still know?... Answer:
What is the difference between gr. editor Gimp and for example Corel? Answer: Raster and vector.
And what is their fundamental difference? Answer: In the vector editor, the image is built according to the formulas that describe the Primitives in the raster by pixel points.
How many windows are in the Gimp editor? Answer: 3 explain which ones.
What groups of instruments do you know? Answer: Select, Draw, Transform
List ways to create a new layer? Answer: Click the New Layer icon on the Layer menu or click the New Layer icon on the Layers panel or paste the image as a layer.
How can you change the arrangement of layers? Answer: Take it and move it without releasing the mouse.
How to resize a picture? Answer: apply the zoom tool, stretch or shrink the image then click Edit.
4. Checking basic knowledge on the topic
Well done, we remembered how to work in Gimp, you know everything and it will not be difficult for you to answer the questions of the next test. The test is located on the desktop of the computer, go to your computers and open the presentation file “Test” (Appendix 1). We start the presentation for a demonstration and select the correct answer by clicking on the text, go to the next slide by clicking on the Next button, on the last slide click Show result.
The teacher shows on the interactive board how to work with the test.
The students take the test. 3 minutes to work. The teacher goes through and writes down the grades received by the students.
After the end, we move to the desks.
5. Presentation of new material
Formulation of the problem:
Look closely at the board (Presentation) and try to decipher the suggested puzzles. (Slide 1, 2)
As you guess, the teacher clicks on the slide and the correct answers come out.
The first is a mask, the second is a gradient, the third is a brush, the fourth is a selection
Well done you guys did well.
Look at the words that you guessed with the help of the rebus, try to formulate the topic of today's lesson. (Slide 3)
Students formulate. More more. Several wordings. One student is asked to summarize everything that has been said. The teacher shows the topic of the lesson. (Slide 4)
Lesson topic: Creating a collage in different ways in graphics editor gimp.
What do you think we should learn today.
Pupils give several answers by formulating a goal.
The teacher clicks on the slide and the lesson objective appears. (Slide 4)
Goal: Create a collage different ways.
Correctly. Well done
(Slide 5) The term “Collage” in French means “sticking”.
Write in a notebook: Collage is a technique in the visual arts, which consists in gluing objects and materials on a substrate that differ from the base in color and texture.
This technique involved cutting out various fragments of images from newspapers and magazines, and sticking them together on a piece of paper to create a single picture, and in childhood, many of us made a collage. (Slide 6)
In the Gimp program, scissors to cut out fragments and paper for gluing will be replaced by tools. What do you think? Answer: selection tools (usually). (Slide 7)
Yes, well done. But this is only one way, and what other ways can there be? They begin to randomly enumerate the instruments.
These are the Gradient and brush tools (click alternately on the slide), but by themselves they cannot select the object, and the Quick Mask comes to their aid, but by no means a carnival. The editor allows you to store its mask along with each layer.
Write in notebook: (Slide 8)Quick mask- The image is open only in those places where the pixels of the mask are white. Black pixels in the mask indicate a closed image - in these places the layer is considered transparent. Therefore, you need to draw in white.
Quick mask is activated by clicking on the icon in the lower left corner of the image
The Gimp teacher program launched in advance on the computer switches between windows by pressing ALT + TAB, shows where the quick mask is located and how it works.
In Quick Mask mode, the image turns red.
So the first way.
The teacher shows in Gimp (if you need to turn on the zoom mode on the projector to enlarge the projected image). First way. Then it switches to the presentation. And students write down the method in a notebook (you can prepare and print out the methods for subsequent pasting in a notebook) (Slide 9)
1 way. Selection tools.
- Select a selection tool, such as Circle.
- Adjust the parameters - feather the edges, set the radius.
- Select fragment.
- From the menu choose Selection Invert. Press Delete
Switches to Gimp shows 2 way, switches to presentation, shows students write in a notebook. (Slide 10)
2 way. brush tool
- Select the Brush tool, parameters Circle Fuzzy (19), set the radius.
- Switch to the Quick Mask mode, click in the lower left corner of the workspace.
- Choose color - white.
- Select area, exit Quick Mask.
- From the menu choose Selection Invert. Press Delete.
- Select the move tool move to Right place.
Similarly, the third way. (Slide 11)
3 way. gradient tool
- Select the gradient tool, adjust the color options from white to black, shape - linear or radial.
- Click on the picture and drag, exit the Quick Mask
A selection will appear, press Delete
6. Primary consolidation of the studied material. (Slide 12)
Practical work.
Today I suggest you create a collage using a photo of the school and a photo of your teachers (I display an approximate slide on the screen (Slide 12)). How do you think this collage was made?
Discussion: background - gradient, faces - selection or brush.
The most interesting works will be shown on the screen in the lobby. Whoever wants can use the camera and take pictures of their classmates for creating a collage.
All photos are in local network on Teacher3/10b/collage/.” Copy the folder to your computer in My Documents. Finished work you save on the network in the documents folder on Teacher3/10b/collage/surname. (Slide 13)
For the successful completion of the task, I have prepared for you detailed instructions, it lies near your computers (Appendix 2) and flash videos (Appendix 3 (on the desktop), if anyone has any questions, you can always open them and once again look at everything that I showed you today in the lesson ).
6. Physical education.
But before work, let's give our eyes a little rest. They closed their eyes and blinked several times. They opened their eyes and looked to the right, then to the left. They wrote their name with their eyes. Okay, now let's move from the table to the computers.
Let's get to work.
Performance practical work(20 minutes.)
In the process, students transfer files over the local network. The teacher looks over and sees who did the job.
8. Summing up the lesson. Self-analysis and reflection of students.
Please answer me the following questions:
- Did you acquire new knowledge and skills in the process of doing the work?
- Did the work done help to consolidate knowledge and skills?
- What was the most interesting part of your work?
- What were the main challenges and how did you overcome them?
- Will collage skills be useful to you, can you use them for personal purposes?
What comments and suggestions can you make for future lessons? Grading.
9. Homework. (Slide 14)
Create a collage on a free topic.
Collage is gluing. That is, the word itself can mean gluing various shapes and figures in a certain area in the workspace. This is an unusual phenomenon, when a person looks at a work of collage, he sees an unusual picture in art.

This is what the picture looks like in the collage. Very unusual. But many novice people who have just purchased a computer are interested in the question - how to make a collage in Paint? Let's take text for example.
Based on the example will be used more a new version software bundled with operating system Windows 7 - Paint Net. The fact is that to create a collage, you need to work with several layers so as not to confuse the image. After all, if you write an inscription, it will be impossible to edit it. And in old version, in Paint, there is no option to create multiple layers. That is, they wrote the text, and you can no longer change it. And if you wrote in an unnecessary place, then you can completely spoil the picture, which will have to be done all over again.
So, first of all, let's create a new layer that will be used for writing text, and write something on this layer.

So, if you did this and wrote the text, then you did everything right. The fact is that by selecting a layer, you will edit only the image that exists on this layer and nothing more. Now, in order to make the sticky effect, you need to re-create the layer and write something else on it using a special tool that allows you to write inscriptions.
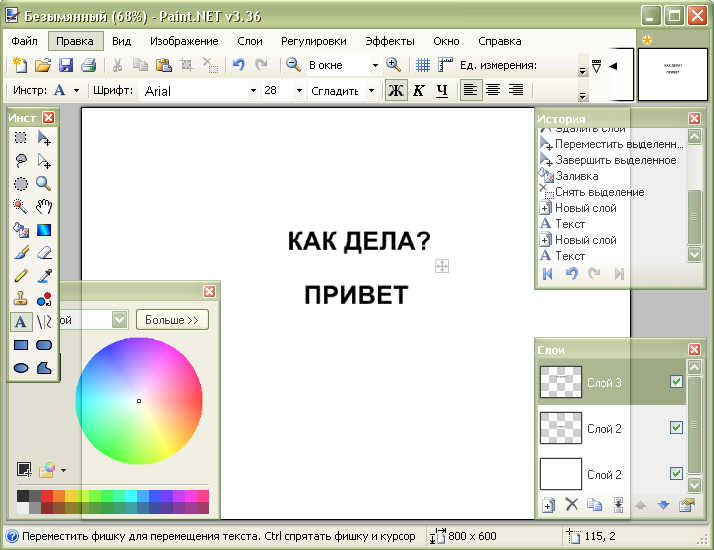
It should turn out as shown in the picture. So, having received two layers with inscriptions, now you can try to stick the images or overlay each other as you like. To do this, you need to select the desired layer that you will move, and select a special tool that will help you move the image of the selected layer.

You should get something like this. But to get a full-fledged collage, you need to use many of these layers with different inscriptions. But if you want to use pictures, the essence is still simple. You will need to add your own image to each layer and edit it so that it merges with the image behind or add various effects. If you want to create a more effective collage, it is better to use a more professional application - Adobe Photoshop.
How to Make a Photo Collage in Paint.NET
A simple and effective tutorial for those who are wondering "How to make a photo collage using Paint.NET". The idea of the lesson is borrowed from the English forum https://forums.getpaint.net/index.php?/topic/12300-polaroid-collage/
So, let's begin. First, let's create the background of the future photo collage. We chose a simple Paint.NET linear gradient of white and gray. After that, we will make a blank for the photo. We will take photos in Polaroid style. Therefore, we will create a new transparent layer, on which we will draw a white rectangle using the Paint.NET “shapes” tool, which will symbolize the base of the snapshot. Please note that the background and the white rectangle are two different layers.

Now paste on the layer with the white rectangle the image from our photo. Immediately after inserting the image, without removing the selection from the inserted image, move it and resize it so that it is inside the white rectangle, like a Polaroid instant photo. You can move and resize a picture in Paint.NET using the "Move Area Tools".

Now select the image of the resulting instant photography and rotate it at an angle.
To select areas of the image in Paint.NET, the tools " area selection tools"are used, and you can rotate by right-clicking using the" tools for moving the area in Paint.NET»

Now to give more reality to our collage, apply to the photo layer an additional
2019-04-11
MS Paint is great for creating simple collages.
If you need to do something more complicated, it is wiser to use Photoshop. It contains more options and your creation will look more professional.
Although, here is an example of creating a collage in Paint from pictures rotated by several degrees, located on a colored background.
The choice of colors is limited by the capabilities of the program, but you can enter your own color.
Collage in Paint
Prepare pictures in advance using MS Paint. How to process images is written.
White background it will take a slightly larger size than we learned to do. Then crop the final image to the desired size.
Create a background, insert the first picture EDIT - INSERT FROM FILE - SELECT IMAGE - OPEN. She will be in the upper left corner.

The picture is selected with the RECTANGULAR SELECTION tool, so it can be moved to the desired place by holding the left mouse button and ROTATED. Try to place it on the right upper corner, and the following pictures below and to the right.

To rotate the picture, in the top menu, click PICTURE - STRETCH AND TILT.
Tilt it horizontally by -5 degrees, vertically by 5 degrees. The picture will be rotated keeping its aspect ratio. 
This will create small jagged edges at the edges of the image. I consider such uneven edges of a photo when making a collage in Paint as a minus. Their height will vary depending on the angle of rotation. You can just experiment by choosing the desired angle of rotation. 
For the bottom image of Winter, I made a horizontal slope of 10 degrees, vertically -10 degrees. Insert other photos.
The images are concentrated in the upper left corner and most of the background is empty. Let's remove the extra background. 
There are small blue dots in the middle and at the corners of the background. Hover over one of them, an arrow will appear, with which you can reduce the background one at a time (and for a corner point - immediately on two sides of the background). CUT the background to the desired size. 
To make the background colored, select the appropriate color from the bottom palette, click on the FILL button (can of paint) in side menu and click on the white background.
If the desired color is not found, change the palette ( Top Menu), add your own color by specifying it numerically.
P.S. This is only a schematic description of the process. Take good pictures or photographs, think over the composition and create.
Where to apply these skills? Make collages:
- as a gift to relatives, friends;
- use when designing a blog, VKontakte group or Odnoklassniki, where bright pictures well attract attention;
- in traffic arbitration by adding advertising labels to the collage.
P.S. Photoshop is better for professional work. Here is the most.
How to make collages in PaintLearning to make collages for tasks in the Paint program:
First, we prepare photos by size, i.e. reduce:
1. click on the photo right click mouse and select "Open with Paint"
2. at the top of the window that opens there are a lot of tools, select "resize".
3. A window will open, and in it you choose: to change your size in percentage or pixels, and a little lower, be sure to make sure that there is a checkmark for “keep proportions”. Then you just need to set one size to change, the other will automatically change and the proportions will be saved - the photo will not be distorted!
4. click "ok".
5. save the resulting photo (this is the “lined leaflet” icon in the upper left corner): select File / “save as”, then “image in JPEG format”, then - select a place (folder) for this photo on your computer and “ok”.
All is ready!
Now let's create a collage:
1. we no longer open the photo, but the “Paint” program itself - Start / Accessories / Paint:
2. a white field will appear in the window
on it and we will collect the collage using the "insert" button, which is located in the upper left corner under the "lined sheet" or Edit / Paste from file. Select "insert from" - a window will appear where you can select the desired photos.
3. click "open", and your photo appears on a white field. With the left mouse button, move it to the right edge of the field, then repeat the procedure with the next photo and drag it to the first one. Attention! If you added the second photo, then the first one will no longer be able to move! Be sure to practice to understand the whole mechanism, to see how it all happens, then create the final work! )
4. You can number the photos using the pencil or brush tools. With a sprayer you can paint over your face!
I did it in Photoshop, but I specifically tried it here - it’s also normal, it’s just that it’s not printed numbers, but in words.
5. having created a collage, save it in the same way as the photos changed before this (see above!), i.e. Must be in JPEG format.
That's all! Hope this guide helps someone. It's a pity not to use such a cool and useful training to the maximum due to technical problems! :))
P.S. You can still crop and resize photos in the program " Microsoft office Picture Manager" using the button at the top "change pictures". This is a standard program, it should be on almost any computer in the package of standard programs. In this program, I cropped the collages, because not all photos sometimes turn out to be the same size, especially when choosing models on the Internet. Cropping here is much more convenient than in Paint.