During the experiments, three routers passed through my hands. One from D-Link and two from Asus. All of them needed improvement. But this became clear later. After I saw new firmware releases on the official website, a trip to the search engines did its job. It turned out that flashing is a common and even necessary thing. The first time I flashed D-Link out of curiosity. I wanted to see what would happen. It did him good. Subsequent Asus WL-520gu and RT-N16 were changed without any doubt. It is important before the "operation" to decide why to flash and what firmware. Why flash - it seems to be clear. New firmware - new features. But what firmware - you need to think. In any case, as a rule, there is always an opportunity to roll back to the factory settings.
If you don't know what firmware to use, go to Google and get to know different opinions. I made up my mind at the time. My choice is DD-WRT. In addition to branded ones, I installed the firmware "from Oleg". Surely this is very good firmware. Many people use it. But I didn't like her. In addition, it is not clear why the domestic development has an English-language interface. Somehow not patriotic. DD-WRT, in my opinion, is more democratic, intuitive, has a lot of usefulness and, finally, international.
So firmware DD-WRT. In order to update to DD-WRT, you need to put the router into firmware recovery mode. We connect a computer to it via LAN, pull out everything USB devices from the router. We register the network address 192.168.1.2 and the gateway address 192.168.1.1 on the computer. Install the supplied software from the disk from the router or download it from the Asus website.
Next, you need to turn off the router, then press the black "Reset" button with a pen or other thin object and turn on the power cable while continuing to hold the same button. At the same time, the power indicator on the front panel starts flashing on the router. After that, we launch the Firmware Restoration program from the ASUS Utility folder, having previously completely turned off all firewalls, incl. built into Windows.
Next, you need to "slip" the file with the initial firmware created specifically for upgrading from the standard one to the program. To download the initial firmware, go to the firmware database.

Enter the last 3 characters of the router name in the input field. Select Asus RT-N16 and get a list of recommended firmware. Download Asus RT-N16 Firmware: Image for initial flashing and for example NEWD K2.6 Big Generic. Subsequently, NEWD K2.6 Big Generic can be easily replaced with a more recent one.

Note: if your router "does not want" to enter the engineering mode (this happened to mine), you can try to "drive" it there by performing a hard reset using the 30/30/30 method. When the router is powered on, press the reset button, hold for 30 seconds, without releasing the button, turn off the power and hold for another 30 seconds, without releasing the button, turn on the power and hold the reset button again for 30 seconds.
IMPORTANT ADDITION.
One day (06/19/2012) I decided to update the firmware. Since I considered myself an experienced fighter, I casually chose the firmware, as a result, the router stopped "pinging" and outwardly seemed dead, although it winked with Lan indicators. However, he did not want to enter the "engineering mode" (firmware recovery mode). For this case, I found a solution that worked for me.
I quote:
Situation: you accidentally flashed the Asus RT-N16 router (which is listed everywhere under the R2 type) with firmware for R1 type routers. Of course, your apparatus pretended to be dead. The web face is not working, IP addresses are not being distributed... You try to put it into recovery mode, but it refuses. You are already despairing, gaining confidence that you have received a brick. But, as I read on one forum, " Asus routers impossible to make with bricks". Therefore, we perform the following actions:
1. Reset to factory settings. To do this, disconnect ALL cables (including power) and hold down (you thought Reset, but figs to you) the WPS button. While holding it down, insert the power cable, hold for about five seconds and release.
2. Set up the computer from which we will restore. We prescribe the static IP address and subnet mask 192.168.1.2 and 255.255.255.0, respectively. Install Firmware Restoration from the utility disk, run and select the firmware image.
3. Switch the router to recovery mode. We insert into any LAN port of the router a cable connected by the other end to the computer from which the recovery will take place. We pull out the power, hold down the Reset, insert the power, hold the reset until the power indicator flashes evenly slowly, release the reset and go to the computer to press the Download button.
4. We are waiting and watching.
5. Reset the router to factory settings via the Web-GUI. Here and without my explanations it is clear how to do it.
I will only add that the described method is most likely suitable for the situation if you install the R2 firmware on the R1 router, although I cannot say for sure.
You can check the readiness of the router to receive the firmware ping command 192.168.1.1 Before hard reset ttl will be 64, after reset ttl becomes 100.
So your router is ready to receive the firmware.

In the Firmware Restoration window, select the file with the minimum firmware with the *.trx extension and click download. The firmware process will begin.
After the program informs you about the end of the file transfer process, wait 3-5 minutes and turn off the power to the router. After 30-40 seconds, turn on the router, wait until it boots up and "ping" ping 192.168.1.1, if ttl=64, then everything is "OK".
We change the ip of the computer to the machine and go to the WEB interface. We will be asked to change the username and password. We change and reboot the router again and go to the WEB interface with a new password. Next, you can upload a full-fledged firmware from dd-wrt.
After downloading the firmware, go to the WEB-interface. Tab Administration Language Selection and change the language to Russian. Click Apply Settings, then Reboot Router. After rebooting, go to the Maintenance tab, Firmware Update. Select the downloaded firmware and click update.

Everything, you with a new firmware.

It remains to configure the parameters of your connection, wi-fi, connect a usb disk, install FTP server, Web server, if you need Samba, install Optware, forward ports (if needed), organize remote control router and computer and much more, whatever your heart desires. In general, only now the real and interesting work will begin!
Corresponding to your router model and its hardware version.
Download the DD-WRT firmware to the router. How to do it for TP-Link routers, written . Firmware replacement instructions for other router manufacturers can be found on the DD-WRT developer's website or on their forum.
After updating the firmware, enter the address into the browser 192.168.1.1 . You will see a page asking you to enter a new username and password. Enter them and be sure to write down.

Let's move on to setting up the router. Select from the menu Setup-Basic Setup. In chapter network setup in field Local IP address write down 192.168.99.1 , this will be the new address of your router. We change it in order to eliminate possible network conflicts with other routers in your network in the future. Which you most likely have.
In Local DNS prescribe DNS server ip address - 8.8.8.8
On the same page in the section Network Address Server Settings (DHCP) turn off 3 options Use DNSMasq for DHCP, Use DNSMasq for DNS, DHCP-Authoritative

Attention, after applying the parameters, the router address will change to 192.168.99.1
In order not to lose control over the router, configure remote access from the external network through the WAN port. Go to page Administration-Management. In chapter Remote Access turn on options Web GUI Management mark http. After that, the router will be accessible by its external ip address and port 8080.

Let's move on to WiFi setup access points. Open page Wireless-Basic settings. In field Wireless Network Name (SSID) enter the name of your WiFi hotspot, for example, the name of your establishment.
In the name of the hotspot it is possible to use only English letters, numbers and symbols. Cyrillic letters cannot be used.

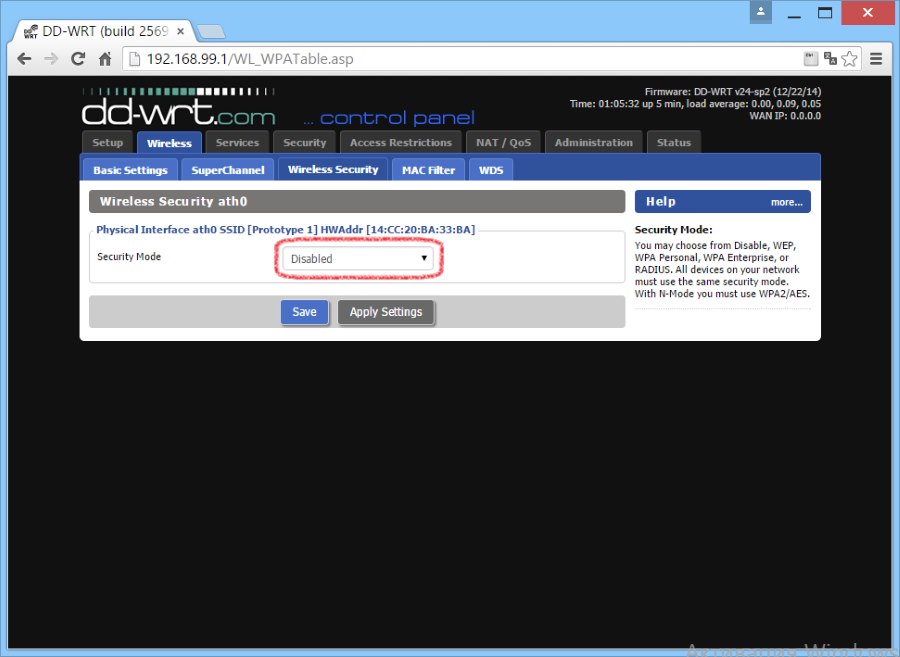
Go to page Wireless-Wireless Security, make sure the option Security Mode is in a state Disabled.
Now let's move on to setting up the hotspot itself.
- Open page Services-Hotspot
- In chapter Chillispot activate the option Chillispot, setting a mark enable
- in field Primary Radius Server IP/DNS enter radius.site
- in field Backup Radius Server IP/DNS enter radius2.site
- in DNS Server IP enter 8.8.8.8
- in Redirect URL enter https://auth.site/hotspotlogin
- in Shared Key enter the key wfs123
- in Radius NAS ID enter your hostpot ID from your personal account
- in field UAM Secret enter your hotspot password from your personal account
- in field UAM Allowed enter
95.167.165.64/27,195.118.0/23.91.229.116.0/22,213.59.64/28.91.200.28.0/24.91.227.52.0/24,198.241.128.66.211.128.28.28.PAL. paypalobjects.com,paymaster..paymaster.ru,www.paypal.com,www.paypalobjects.com,www..site,support.site,lk.site,account.site,s1.site,s2.site,s3. site,s4.site,s5.site,s6.site,s7.site,s8.site,s9.site,s10.site,s11.site,s12.site,s13.site,s14.site,s15.site, s16.site, s17.site, s18.site, s19.site, s20.site
For social networks, you additionally need to specify the addresses:
103.4.96.0/22,104.108.32.0/20,104.244.40.0/21,107.20.0.0/14,157.240.0.0/16,173.194.0.0/16,173.252.64.0/18,184.84.0.0/14,185.16.244.0/22,185.29.130.0/24,185.32.248.0/22,185.45.4.0/22,188.166.114.0/24,192.133.76.0/22,199.16.156.0/22,199.201.64.0/22,199.59.148.0/22,199.96.56.0/21,2.20.254.0/24,2.21.7.0/24,204.15.20.0/22,212.30.134.0/24,213.180.193.119,217.20.144.0/20,217.69.128.0/20,23.64.227.0/24,31.13.0.0/16,34.192.156.0/24,34.194.135.0/24,34.194.67.0/24,34.198.69.0/24,34.200.158.0/24,34.200.33.0/24,45.64.40.0/22,46.101.169.0/24,5.61.16.0/21,52.0.0.0/11,54.144.0.0/9,54.88.138.0/24,54.88.208.0/24,64.233.160.0/19,66.220.144.0/20,69.171.224.0/19,69.63.176.0/20,74.119.76.0/22,74.125.0.0/16,8.25.195.0/21,87.240.128.0/18,87.250.250.0/23,93.158.134.0/24,93.186.224.0/20,95.142.192.0/20,95.167.165.90/24,95.213.0.0/18

Possible problems
Make sure you didn't accidentally enter extra spaces in the UAM Allowed field, otherwise something may not work. In case you are using beta firmware DD-WRT, you will need in the fields Primary Radius Server IP/DNS and Backup Radius Server IP/DNS write instead of names radius1.site and radius2.site their IP addresses 195.14.118.42 and 95.167.165.93
Choosing a home router usually comes down to going to the store and buying what they recommend and preferably for a small price. Then there are variations on whether you need WiFi or not, printer support, and perhaps that's all. And now I have a Dlink DIR-320 in my hands. To be honest, I needed the DIR-320 to flash it into a completely different device. But before starting my experiments with it, I decided to test it, so to speak, for its intended purpose.
It makes no sense to give technical characteristics of the Dlink DIR-320, whoever needs it can easily find them.
I would like to dwell on its interesting features and on the types of firmware for it with subsequent testing.
As you can imagine, there are both official and non-official.
Part one - official
At the time of writing, it was downloaded from the official site latest firmware by number: 1.21
Supported protocols for working with providers: Static IP, DHCP, PPPoE, L2TP, PPTP.
This means that you can connect the DIR-320 to almost any provider. And the most interesting is the support for the MPPE128 encryption protocol but only for PPTP, to persuade the router to connect via L2TP using encryption standard means does not seem possible.
The wireless communication standard WiFi is 802.11g with its 54Mbps.
USB port for connecting a printer. For the sake of interest, I tried it with my Cannon MP600 MFP - printing happens immediately and without any problems. The scanner did not check.
Now the actual topic of the question.
What real speed can DIR-320 provide? And here's what I got.
I think the organization of the table will be clear to everyone. Now let's talk about values.
LAT - LAN - 95 Mbit / s indicates that there are no internal restrictions in the 4-port switch.
LAN - WiFi - 27 Mbps at a distance of half a meter. Many will ask where are the promised 54? It wasn't, it isn't and it won't be.
Understand there is a big difference between the theoretical peak and what it actually is, this applies to all devices with WiFi, and the DIR-320 is no exception in this regard.
Walking around the apartment with a laptop, the speed did not fall below 20 Mbps, which is a very good result.
Connecting to a provider via a regular IP (without add-ons like PPTP or L2TP) gives excellent results and connecting even the fastest Internet tariffs makes sense with such a scheme.
But PPTP, which regional-scale providers like to connect so much, does not indulge in speed at all - only 12 Mbps.
This means that if your tariff plan entitles you to a speed of more than 10 Mbps, then you simply won’t be able to enjoy access to the worldwide network at full speed. In fact, the router will not pass more than 10 Mbps through itself.
The speed drops even more if you enable MPPE encryption, but as a rule, providers do not support it, and by the way, it’s very in vain!
L2TP looks a little better, so if your provider supports PPTP and L2TP connections, then you should give preference to the second protocol.
Now I'll try to summarize standard firmware and the device as a whole.
The functionality is really rich, the organization of the settings is quite simple, wireless connection also works fine. Great device for very little money.
If your ISP only supports PPTP or L2TP connections,
and you want to surf the net at speeds greater than 10Mbps, then you need a more serious router. In other cases, it's a great choice.
Part two - official but for some reason forgotten Yota>
Some time ago, under DIR-320 at the office. The site had a firmware version for the router to work with Yota. I was very surprised when I didn't find her website...
The guys from Dlink, they really refused to comment on Yota, they say yes it used to be, now it’s not and never will be. But in vain, many people need a cheap router with support for Yota USB modems. I don’t know who didn’t share what with whom, but in general the company’s policy is now ...
By truth and not quite by truth, I managed to get the latest version of the firmware that was on the Dlink website (links at the end of the review).
So: generic-2.0.130 with Yota support.
Unfortunately USB Yota modem I didn’t find it, so I’ll limit myself to testing without it.
In general, the indicators are worse, and this is sad.
Only L2TP significantly increased bandwidth. But there is no MPPE encryption in general.
And a few words about the interface. Unlike the official firmware 1.21, where the interface looks very clear and user-oriented, this web interface can scare even experienced system administrators with its indistinctness and confusion.
In total, if you do not need Yota support, then my advice to you is to stay on official firmware 1.21.
Part three - not official or DD-WRT
I didn’t manage to get a clear answer right away what is hidden behind this abbreviation, so I’ll say it in my own words.
DD-WRT is alternative firmware expanding the functionality of a number of devices, including the DIR-320.
There are various types of it, slightly differing in the functionality sewn into them. For example, there are firmware that allow you to turn your DIR-320 into VPN server, or make a file storage out of it. Those who wish can always experiment.
Returning to Yota, initially there is no support for it in DD-WRT!
Flash DD-WRT from built-in web interface but you can’t, here you need to act a little differently.
On the network there are instructions for its firmware. I offer you my version, which is minimally short term will give you results.
First of all, download the firmware file by entering the name of the DIR-320 model in the search bar.
There will be several download options to choose from. I chose the standard dd-wrt.v24_std_generic.bin
We put it for example in C:\DIR-320
In the same directory, create a flash.bat file with the following content:
code:
@Echo Off
:BEGIN
arp-d
ping -n 1 -w 10 192.168.0.1
If errorlevel 1 Goto BEGIN
If errorlevel 0 Goto FLASH
Goto END:FLASH
Echo *** Start Flashing ****
tftp -i 192.168.0.1 put dd-wrt.v24_std_generic.bin
I won’t go into details, it’s just necessary and that’s it :) Oh, yes, if you have Windows components do not need tftp, install it, there are a lot of instructions on the net.
In order for everything to go well, we continue to do exactly as I wrote.
We assign 2 addresses to the network card 192.168.0.10 and 192.168.1.10 mask 255.255.255.0 We connect our network card cable directly to LAN 1 DIR-320 port, everything else from the router must be disabled for the duration of the firmware.
Further points:
2. Run the flash.bat file as Administrator
3. Press RESET on the router
4. Turn on the power, while all the lights on the router should light up
5. We are waiting for them to go out and only LAN1 remains on, wait for EXACTLY 4 more seconds and only then release RESET.
The LAN1 indicator should blink intensively for 2-3 seconds, which will indicate that the filling has begun.
Somewhere in 2-3 minutes, you can knock on the new address 192.168.1.1 where you will be asked to SET an administrator login and password. Oh yes, I almost forgot to say, you just lost your warranty :)
So I won’t talk in detail about the functionality, who are interested can see for themselves, I’ll just say that it has become richer, but at what cost?
Surprised? I honestly say too. Not only did the router become slower in all respects, besides that, it refused to connect via PPTP!
After I, so to speak, on personal experience, I tried DD-WRT, I personally do not understand all the laudatory reviews about flashing DIR-320 to DD-WRT. Personally, all this functionality is simply not needed for me with such a drop in throughput in all respects.
Part Four - back or return everything as it was
I did not succeed in flashing native firmware via tftp in a similar way. Here it is necessary to act somewhat differently.
Further points.
1. The router must be turned off.
2. Run the command arp -d
3. Run ping 192.168.0.1 -t
4. Press RESET on the router
5. Turn on the power, while all the lights on the router should light up
6. We are waiting for them to go out and only LAN1 remains on, wait for EXACTLY 4 more seconds and only then release RESET.
7. We go through the browser to the simplified Web interface where we select the file with the official firmware.

After a couple of minutes, the firmware will be completed.
Many other Dlink products can be brought back to life in a similar way. It is important to run ping 192.168.0.1 -t. For reasons I do not understand, if this is not done, then the bootloader simply flies by, and the device will either reset its settings or continue to boot normally, depending on how much patience you have RESET.
Summarizing
If you just need a good home router, feel free to stop at the official firmware and don't invent it. If you need Yota support, then it makes sense to either try the office. firmware with Yota, or even choose another device, since Dlink has stopped all support for the combination of DIR-320 and Yota, which is extremely sad.
Masochists ... in the sense of enthusiasts, they can try third-party firmware like DD-WRT, but after testing, using DD-WR for normal purposes seems to me much more harmful than useful.
The DIR-320 has 4 megabytes of flash memory installed, so the firmware must be no larger than the specified size. You can use the standard version, but in this case, file system jffs leaves no room for custom files. It is preferable to use firmware from Eko - they can be found in the others / eko / V24_TNG / svnNNNNNN folder (select the folder with the largest number). For USB support, you can select NEWD_mini_usb_ftp or NEWD_mini_usb version.
If you require more functionality than what is provided in mini versions or standard, use the method described on Installing DD-WRT mega on Routers with 4MB Flash Memory.
[edit] Preparing for the firmware
If your router is already flashed with DD-WRT, then new version this firmware can be downloaded to it using the web interface. If the router has proprietary D-Link firmware, then due to the difference in file formats with DD-WRT firmware, it can only be downloaded using the TFTP protocol. The download procedure is described in detail below.
Create a folder on your C: drive (eg C:\dd-wrt). Download the firmware file to this folder and rename it to firmware.bin.
Set the network interface IP address of your computer to 192.168.0.10 and the mask to 255.255.255.0. Connect the network connector of your computer to the LAN1 port of the DIR-320. Do not power on the router yet.
[edit] Manual firmware
Before using TFTP, it is worth trying to upload DD-WRT through crash mode (less time will be spent). If there are problems, then go to the firmware via TFTP.
The DIR-320 is flashed using the TFTP protocol. After turning on the power of the router for a short time (about 2 seconds), the built-in TFTP server starts, with which you can download to the device new firmware. The most difficult thing is to catch the right moment in time during which you need to issue a command to download the firmware. It rarely works the first time, so be prepared to make several attempts and be patient.
Important: Probably DIR-320 with fresh D-Link firmware do not start the TFTP server at all and it is impossible to catch the right moment in time. In this case, in order to download your firmware the first time, you will have to do full reset DIR-320: turn off the power, press and hold the Reset button, turn on the power, wait 15 seconds, release the Reset button. After this procedure, the router should respond to ping with TTL=100:
Reply from 192.168.0.1: bytes=32 time<1ms TTL=100
In this state, the router is non-functional, it is waiting for the firmware to be downloaded via the web interface (D-Link only) or via TFTP. Moreover, TFTP does not work all the time, but only a few seconds (about 4 seconds) after turning on the power. This is not much, but enough to upload the firmware the first time. Turn off DIR-320.
Run on your computer command line, go to the dd-wrt folder on the C:\ drive and type the following command, but do not press the key yet
Microsoft Windows XP Copyright 1985-2001 Microsoft Corp. C:\Documents and Settings\someuser> cd c:\dd-wrt C:\dd-wrt> tftp -i 192.168.0.1 put firmware.bin
(The commands you have typed are in bold.)
Immediately before starting the firmware, it is advisable to reset to the factory settings (Reset button, next to the power socket).
You must press the key
Successful transfer: 3092480 bytes in 11 s, 281134 bytes/s
If you are in a hurry or late, press the key
Keep in mind that the flashing process continues for several minutes after the file transfer command completes, so do not turn off the power to the router and do not press Reset immediately after this command completes. Give the router 10 minutes to complete the flashing process. During this time, drink a cup of coffee and enjoy - and only then proceed to the next item. If in the list wireless networks a new SSID "dd-wrt" has appeared - it means that the firmware process has successfully completed.
In order not to catch the moment at which you need to issue the download command manually, use the method described in the next section.
Attention: AT latest versions router if a tftp message is issued
[edit] Firmware using a batch file
We write the flashing.cmd file to the C:\dd-wrt folder, where we previously wrote the file with the firmware. The content of this file is the following:
@Echo Off:BEGIN ping -n 1 -w 10 192.168.0.1 If errorlevel 1 Goto BEGIN If errorlevel 0 Goto FLASH Goto END:FLASH Echo *** Start Flashing **** tftp -i 192.168.0.1 put firmware.bin: END
A more advanced version of the batch file with output of comments to the console is given in the appendix (see below).
We start the command line, go to the c:\dd-wrt folder and run batch file flashing.cmd.
Turn on the power of the router.
We observe the firmware process:
C:\dd-wrt>flashing.cmd Packeting from 192.168.0.1 to 32 bytes: Request timed out. Ping statistics for 192.168.0.1: Packets: sent = 1, received = 0, lost = 1 (100% loss),<<< SKIP >>> <<< SKIP >>> <<< SKIP >>> <<< SKIP >>> Packet exchange from 192.168.0.1 to 32 bytes: Reply from 192.168.0.1: number of bytes=32 time=4ms TTL=100 Ping statistics for 192.168.0.1: Packets: sent = 1, received = 1, lost = 0 (0 % loss), Approximate round-trip time in ms: Minimum = 4ms, Maximum = 4ms, Average = 4ms dd-wrt>
After the status indicator lights up (~1-2 minutes), you can connect to the router at 192.168.1.1.
Another version of the batch file (the first one did not help in my case) is to call several tftp processes from the moment the router is turned on with an interval of, for example, 500ms in a row. Accordingly, one of them will fall at the moment when the router "agrees" to accept the firmware. How to pause http://wiki.oszone.net/index.php/Pause_in_batch_file , I used nircmdc.exe (http://www.nirsoft.net/utils/nircmd.zip)
For /l %%a in (1, 1, 10) do (nircmdc.exe wait 500 start cmd.exe /ktftp -i 192.168.0.1 put firmware.bin)
Run this batch file at the same time as turning on the router. 10 console windows will open, and in one of them the file will be loaded, all the others will fall off by timeout. If you still can’t get into the desired interval, then you can additionally disable in windows reset IP addresses in the absence of a cable connection (will speed up the initialization of the interface). Create a reg file with the following content:
REGEDIT4 "DisableDHCPMediaSense"=dword:00000001
Add information to the registry, restart the computer and try to flash the router again.
[edit] Connecting to the DD-WRT Web Interface
After successful firmware, configure your computer's network interface to receive an IP address from DHCP server and enter in address bar your browser http://192.168.1.1 . By default, the username and password for accessing the web interface are "root" and "admin" respectively (without quotes).
If you still see the D-Link web interface, repeat the flashing procedure.
P.S. Another simple and convenient way to catch the moment of turning on the firmware mode is to use the arping command (In * nix systems it already exists), for Windows you can google or try this link http://www.ipacct.com/f/arping_for_windows-1.0.zip , as soon as there is the first answer - you need to send the file to the router and everything will be sewn :)
[edit] Firmware recovery
Restoring proprietary firmware after DD-WRT is again done using TFTP.
[edit] Applications
[edit] Appendix 1. Extended version of the flashing.cmd file
An extended version of the flashing.cmd batch file with output of comments to the console:
@echo off echo ============================================= ==================== echo This batch file will upload dd-wrt firmware in the current directory to echo 192.168.0.1 during the router's bootup. echo. echo * Set your ethernet card"s settings to: echo IP: 192.168.0.2 echo Mask: 255.255.255.0 echo Gateway: 192.168.0.1 echo * Unplug the router"s power cable. echo. echo Press Ctrl+C to abort or any other key to continue... pause > nul echo.echo * Re-plug the router's power cable. echo. echo ================================================ ================= echo Waiting for the router... Press Ctrl+C to abort. echo. set FIND=%WINDIR%\command\find.exe if exist %FIND% goto PING set FIND=%WINDIR%\system32\find.exe if exist %FIND% goto PING set FIND=find:PING ping -n 1 -w 50 192.168.0.1 | %FIND% "TTL=" if errorlevel 1 goto PING echo *** Start Flashing **** tftp -i 192.168.0.1 put firmware.bin if errorlevel 1 goto PING set FIND= echo. echo ================================================ ================= echo * WAIT for about 2 minutes while the firmware is being flashed. echo * Reset your ethernet card"s settings back to DHCP. echo * The default router address will be at 192.168.1.1 echo. pause
[edit] Appendix 2. Bash script similar to flashing.cmd batch file
Bash script similar to the extended version of the flashing.cmd batch file.
#!/bin/bash echo "========================================= ========================" echo "This script will upload dd-wrt firmware (firmware.bin)" echo "in the current directory to 192.168. 0.1 "echo "during the router"s bootup. " echo "" echo "* Set your ethernet card"s settings to: " echo " IP: 192.168.0.10 " echo " Mask: 255.255.255.0 " echo " Gateway: 192.168.0.1 " echo "* Unplug the router"s power cable. " echo "" echo "Press Ctrl+C to abort or any other key to continue... " read echo "" echo "* Re-plug the router"s power cable. " echo "" echo "===== ================================================= ===========" echo "Waiting for the router... Press Ctrl+C to abort. " echo "" try()( ping -c 1 -w 1 192.168.0.1 ) try while [ "$?" != "0" ] ; do try done echo "*** Start Flashing **** " atftp --no-source-port-checking -p -l firmware.bin 192.168.0.1 echo "Firmware successfully loaded!"